Which Client Status Manager status settings can be edited, and which are set automatically by the program?
To manually set return status from within CSM, right click the return, from the pop-up menu select Set Client Status, and from the drop list select the desired status. You can also set Client status from within the return by clicking the CSM button and selecting the desired status. There are eighteen available status settings.
Eight of the status settings are predefined and cannot be renamed. Seven of them are set automatically by the software, although they also can be set manually. The Complete predefined status must be set manually. Other status settings are editable and must be manually set. See the chart below.
The Complete status, which must be manually selected, stops all further automatic status changes by the program. Manually setting any other manual or automatic status does not prevent the program from setting status automatically when a later triggering event occurs.
|
CSM Status Settings
|
|
|
How Status is Set
|
|
|
Status
|
Manual
|
Automatic
|
Triggering Event
|
Editable
|
|
New Client
|
X
|
X
|
When a new file is created
|
|
|
In Progress
|
X
|
X
|
When the first change is made to the return in data entry
|
|
|
EF Pending
|
X
|
X
|
When a “P” ack is received
|
|
|
EF Accepted
|
X
|
X
|
When an “A” ack is received
|
|
|
EF Rejected
|
X
|
X
|
When an “R” ack is received
|
|
|
Printed
|
X
|
X
|
When the return is printed through Print Sets
|
|
| EF Ext Accepted |
X |
X |
When an "A" ack is received for an Extension. |
|
|
|
|
|
|
|
|
Complete
|
X
|
|
None. Set manually when desired. Stops all further automatic status updates.
|
|
|
|
|
|
|
|
|
Waiting on Documents |
X
|
|
None. Set manually when desired.
|
X
|
|
On Hold
|
X
|
|
None. Set manually when desired.
|
X
|
|
Under Review
|
X
|
|
None. Set manually when desired.
|
X
|
|
Signed
|
X
|
|
None. Set manually when desired.
|
X
|
|
Delivered
|
X
|
|
None. Set manually when desired.
|
X
|
|
Custom Status 6 through 20
|
X
|
|
None. Set manually when desired.
|
X
|
To edit status settings, click the Customize button and select the Status Settings tab. Select a status, click Edit and make any desired changes. Click OK to save any changes, and click OK again to save all changes and exit the Customize Display screen.
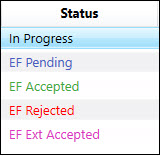
You can set a color to correspond to each status, if desired by using the Color Settings tab on the Customize Display screen.
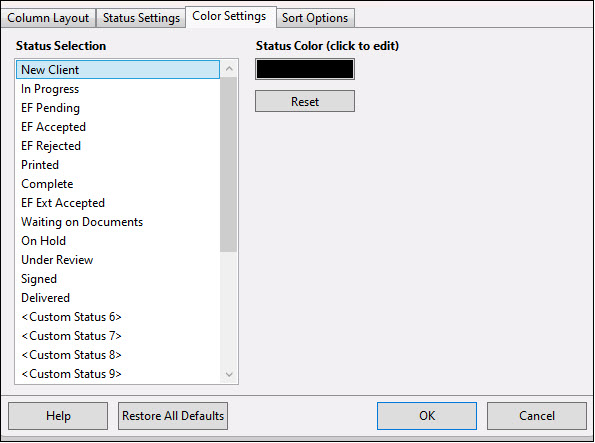
Select the status that you want to have a custom color > click Edit > Select one of the available Basic Colors or click Defined Custom Colors > Click OK to save any changes, and click OK again to save all changes and exit the Customize Display screen.
Once your colors have been selected, clients currently in your Personal Client Manager (PCM) and your Client Status Manager (CSM) will update with the new color scheme.
The Sort Options tab can be used to further sort the columns in alphabetical (or reverse alphabetical) order.
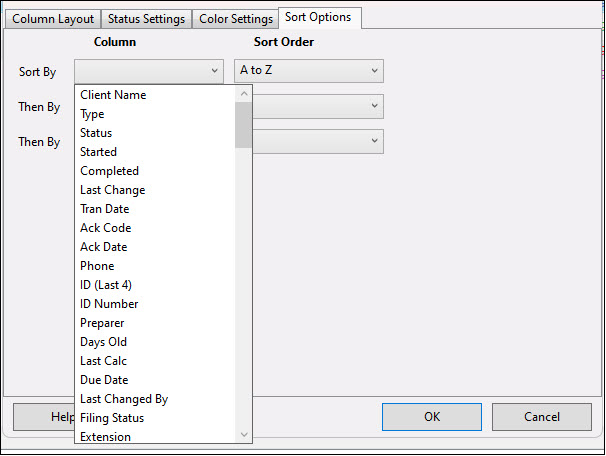
The available items in the column list will vary depending on what columns you have selected to include in the CSM on the Column Layout tab. You can apply up to three sort options at a time.
On a scale of 1-5, please rate the helpfulness of this article
Optionally provide private feedback to help us improve this article...
Thank you for your feedback!