How do I upload documents to Drake Portals for one of my clients to download?
To upload files for a specific client in Drake PortalsTM, you have three choices. You can upload:
- From any accessible folder on your computer or network, using your web browser.
- From Drake Tax when you print client documents to PDF from View/Print mode.
- From Drake Documents.
In all cases,
- A copy of the document uploads to the client's SFP folder and you see a confirmation message.
- In Drake Portals,
- the uploaded file displays a time stamp.
- A transaction report is available at Settings > Reports > Latest File Transactions (select Employees from the For drop list).
Important: For uploads from Drake Documents or Drake Tax, if the upload client does not have a website folder, you are prompted to create the folder or select a client folder to associate with this client during the upload. This can also be done within Drake Documents by selecting the client from the tree on the left, then selecting "Search" to find an existing client account, or "Create" to create a new client account. If you create the folder, include the client's email address. Without an email address, the client is not notified that the account exists and cannot access it.
Note: You can also upload public documents to the Public folder for any client to download. See Related Links below.
To upload files for a specific client, choose from the following options.
For a video demonstration of uploading and downloading documents from Drake Portals, see Portal Overview (Firm) and Portal Basics (End User).
Upload using your web browser:
- Save the documents you want to upload to a location to which you can easily browse.
- Open your browser and log in to your Drake Portals website.
- On the Home window, select the client from the Clients section.
- Under the From Preparer section, click the Upload icon.
- Select the file to be uploaded and click Open.
- Click Add to upload additional files (optional).
- Click Upload File(s).
- A copy of the document appears in the client's From Preparer folder.
Upload from Drake Tax:
Whenever you print to Drake Documents with the Drake PDF printer, select the Upload to Client's Portal option to upload the selected documents to the client's Drake Portals folder.
- After the PDF is printed, a dialog box displays the client's Drake Portals folders.
- Select Documents from Preparer. You also can select a dialog box option to send an upload notification email to the client.
- Click Upload.
- A copy of the document is saved in the client's Documents from Preparer folder.
- A File Upload Report is displayed confirming it. The report can be viewed later from the Drake Home window under Reports > Report Viewer on the Standard Reports tab.
This process works for printing selected documents as well as for sets. For sets, the Print Sets dialog box offers the Send to Portal option. See Related Links below.
Upload from Drake Documents:
- Open Drake Documents. Note the Drake PortalsTM pane at the bottom right of the Drake Documents window. If you do not see this, select to restore or maximize. Click Login, then enter your credentials and log in.
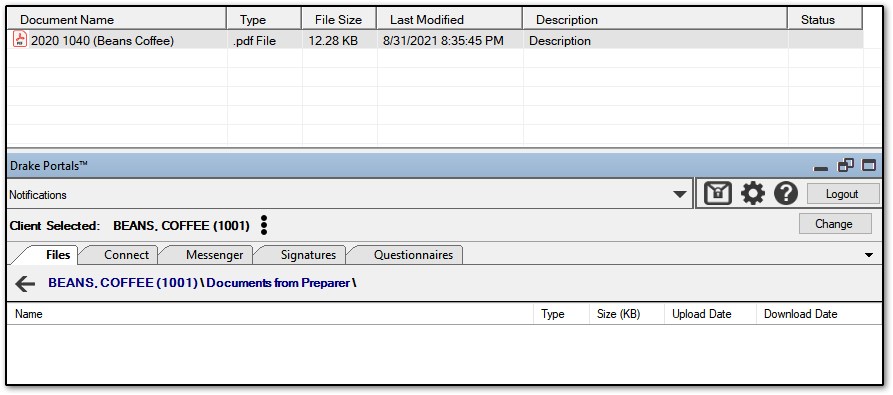
- Locate and select the taxpayer and folder that contains the file that you want to upload. The file will be displayed in the upper right window. In this example, a 2020 PDF is available for upload for taxpayer "Coffee Beans."
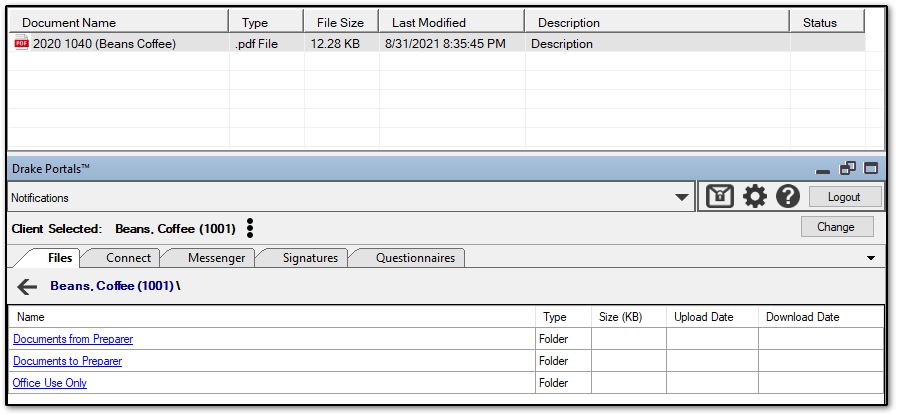
- On the Files tab in the Drake Portals pane, select the destination folder. For example, choose Documents from Preparer. The window changes to show this folder and its contents on Drake Portals:
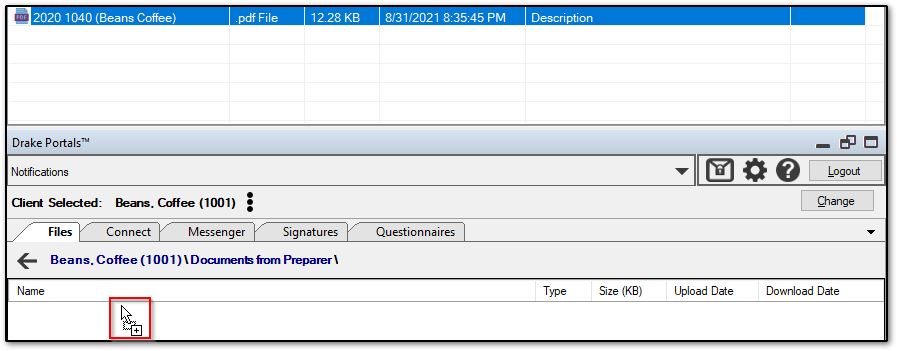
- In the upper right pane, left click to select the document that you want to upload and drag it down into the lower Drake Portals pane. The cursor will show a + sign indicating that the document(s) will be uploaded or added to this folder. When the cursor changes, release your mouse click to upload the file.*
Note the file details after upload:
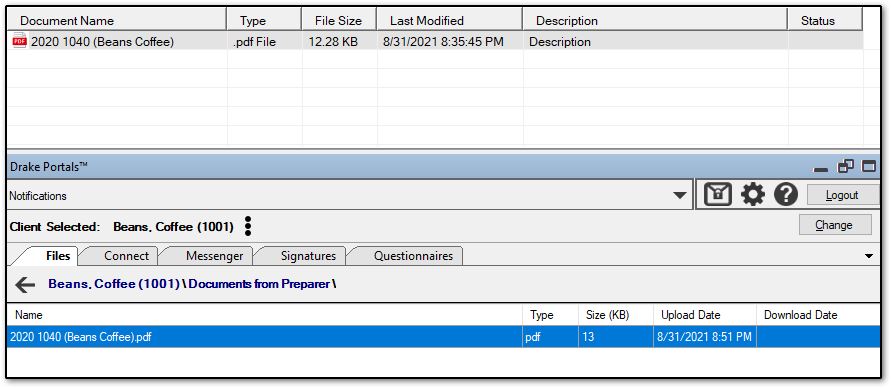
- The taxpayer receives an email notification that new documents are available for review. Once they download the PDF, a Download Date will also display in this pane.
*Note: You can also copy the file from the documents pane and paste in the Drake Portals pane after selecting the destination folder.
On a scale of 1-5, please rate the helpfulness of this article
Optionally provide private feedback to help us improve this article...
Thank you for your feedback!