Drake Accounting®: How do I create customer invoices?
To create customer invoices:
- Select the Receivables menu, then select Invoices.
- Select the applicable customer from the customer list, then select New.
- Some fields will auto-populate based on the Customer Setup.
- Complete the field information:
- Invoice Number (required)
- The next invoice number displays if the option to auto-increment this number was selected during setup (Receivables > Options > General Options > Auto Invoice Numbering).
- If Auto Invoice Numbering was not selected, enter an invoice number.
- If you manually enter an invoice number and Auto Invoice Numbering is turned on, the next invoice will auto-increment to the following invoice number greater than the one entered.
- Do not enter a previously used invoice number.
- Invoice Date (required)
- The invoice date defaults to today's date for use in the calculation of aging information.
- Edit the invoice date as needed.
- Invoice Type (required)
- The invoice type flows from the Customer Setup.
- Change the invoice type if applicable
- Invoice Transaction (required)
- Select a transaction type from the drop list that identifies the majority of items on the invoice.
- Once a transaction type is selected and the invoice is saved, the same transaction type applies to the next new invoice entered (until the Invoices screen is closed).
- Terms
- The payment terms flow from Customer Setup.
- You may select a different term on the invoice as needed.
- Terms are set up by going to the Payment Terms tab under Receivables > Options.
- Due Date
- Select a due date for the invoice.
- Customer information
- The information pulls from what has been entered on the Customer Information tab of Customer Setup.
- Status pulls from the status that has been selected on the Invoice Options tab of Customer Setup.
- The status is originally created under Receivables > Options > Customer Status tab.
- Sales Tax
- The Tax Code field fills based on the tax code selected during customer setup.
- The State, County, and City sales tax rates associated with the selected Tax Code are displayed.
- Select a different Tax Code as needed for the invoice.
- Edit the individual State, County, or City tax rates as needed by entering a decimal value less than one (0.05 equals a 5% sales tax rate).
- The Total Rate adds up the rates that have been entered under the Sales Tax Setup.
- Select a Sales Transaction. If you need to create a new transaction type, select <New Account>.
- Return Invoice
- Select a Return Transaction Type from the drop list. If you need to create a new transaction type, select <New Account>.
- Select the date of the return
- Payment
Enter at least one invoice line item before entering the Payment Received amount.
- If the Payment Type is "check", enter the Check Number (if known).
- If a payment is received when making a sale, select the Payment Type, enter the payment amount in the Payment Received field, and select the Transaction Type.
- Select the Transaction Type based on the majority of items sold on the invoice.
Enter full or partial payments. If entering a partial or nonpayment on the Invoices screen, make additional payments by going to Receivables > Payments. Payment information entered during invoice data entry is displayed on the Payments screen once the invoice is saved.
Invoice Line Items tab
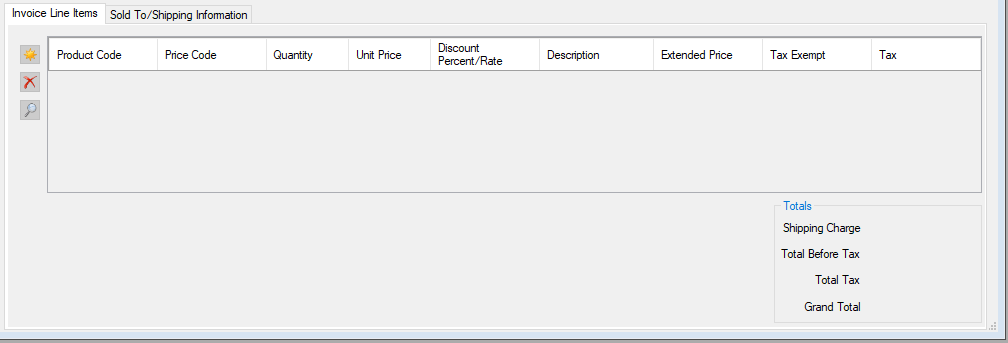
The Invoice Line Items section displays different fields for Product Invoices and Service/Professional Invoices. Add one or more line items to an invoice following these steps:
- Select the New icon (
 )
)
- Double-click the cell below Product Code and select the applicable item or service to include on the invoice from the Product Code window. Tab through the end of each line item to ensure the totals, tax, and discounts calculate correctly.
- All field values can be edited except the Extended Price (product invoices) and Tax (product invoices). Input for the Quantity is required.
- Select the New icon () to continue adding line items as applicable. To delete a line item, select the applicable line, then select the Delete icon (
 ).
).
- Select Save once invoice entry has been completed, or continue to the Sold To/Shipping Information tab if any shipping or billing information requires editing.
Sold To/Shipping Information tab
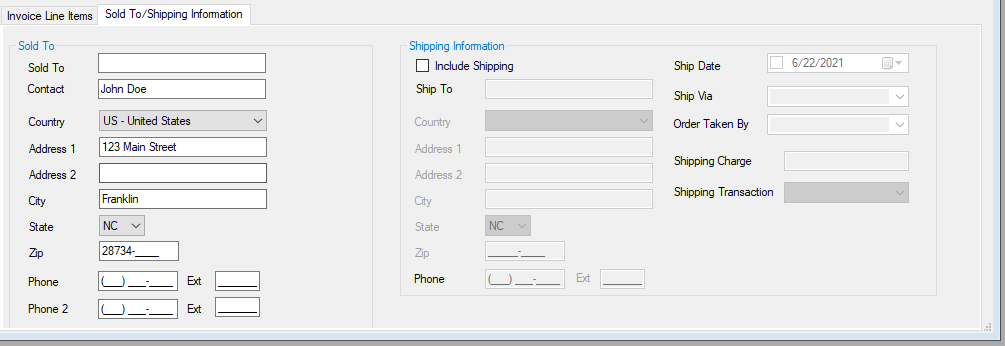
The information on this tab flows from Customer Setup and should not normally require editing.
- Complete the following fields:
- Sold To
- Edit any of the customer information as needed for this invoice. If the information previously set up is appropriate for this invoice, no edits are required.
- Ship To
- Edit the customer shipping information as needed. If the information previously set up is appropriate for this invoice, no edits are required.
- Ship Date
- Select the date the order is scheduled to ship to the customer. The current date is the default shipping date.
- Ship Via (optional)
- The shipping method flows from the Ship Via field in Customer Setup. Change the shipping method as needed for this invoice.
- Order Taken By (optional)
- Use the drop list to select the person who took this order.
- Once all information for the invoice has been entered, print. Under the Print icon there are three options:
- Customer Statement
- Invoice
- Transaction Record
- Once you choose an option, the selected format appears in a Report Viewer and additional selections/ overrides for formatting can be made.
- To view invoices on your computer screen before printing, select the Print/Preview Invoice on Save checkbox. Once selected, this option remains in effect until the checkbox is manually cleared.
If using the Generate Accounting Transactions option, the method of accounting will determine when accounting transactions are created. If using the Cash method of accounting, transactions are not created until a payment is created/received. If using the Accrual method of accounting, transactions are created when the invoice is created as well as when a payment is created/received.
On a scale of 1-5, please rate the helpfulness of this article
Optionally provide private feedback to help us improve this article...
Thank you for your feedback!