Drake Accounting®: How do I set up emergency paid leave benefits and do payroll related to sick pay for the COVID-19 pandemic?
The setup is divided into four parts detailed below.
- Creating a COVID-19 Benefit
- Assigning the Benefit and Creating Payroll
- Generating Transactions (Optional)
- Tracking Wages and Hours with the Emergency Paid Leave Report
Four benefit codes have been added to the Benefits tab (Employees > Deductions & Benefits) to help track Emergency Paid Leave as a result of COVID-19. The purpose of these benefits is to give the employee the same paycheck that they are used to receiving, but the pay will be applied to a benefit instead of regular pay.
See below for benefit descriptions. It may be helpful to review these descriptions before setting up the benefits to make naming the benefit easier.
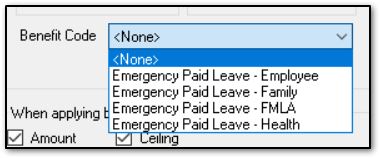
You must select a benefit code when setting up a COVID-19 benefit so it can be properly tracked. Based on the benefit codes, the benefits are:
- Employee
- Choose Employee if the employee is sick and under quarantine with COVID-19.
- Family
- Choose Family if the employee is taking care of a family member who is sick or impacted with COVID-19.
- FMLA
- Choose FMLA if the employee is taking leave under the Family Medical Leave Act (FMLA) to care for children under 18 whose school or child care is closed because of COVID-19.
- Health
- Choose Health if the employer is contributing to an employee’s health insurance during the time they are being paid under the FFCRA provisions.
Part 1: Creating a COVID-19 Benefit
- Optional: Create a new expense account under Accounting > Chart of Accounts for COVID-19 related expenses. Save when finished.
- You do not have to create a new account (i.e., you can use another pre-existing account), but for the purposes of this tutorial, a new expense account will be created.
- It depends how you wish to track these benefits and how you want the expenses to show up on reports.
- Go to Employees > Deductions & Benefits > Benefits.
- Name the benefit and select the expense account you created in step 1 (or whatever account you will use to track COVID-19 related expenses).
- For Amount:
- For the benefits Employee and Family, enter "0" here.
- These are hourly rate benefits, which means the amount may differ from employee to employee because of their hourly rate.
- You will enter the hourly rate for the benefit for each employee under Employee Setup.
- For FMLA and Health, either enter the flat amount here or you can enter "0" and enter the flat amount for each employee under Employee Setup.
- For Ceiling, enter the maximum available amount of this benefit.
- When an employee reaches the ceiling amount for the year, Drake Accounting® discontinues giving this benefit to that employee.
- Ensure you are entering the correct ceiling amounts. See below for more information.
- Select the applicable state this benefit applies to or select <ALL> to apply the benefit to all states for multi-location employees.
- From the Based On drop menu, select Dollars/Cents.
- For Employee and Family, check Based On Hours Worked.
- For any of the four benefits, under Taxing and Income Options, select Taxed – Apply to Gross and Net Pay.
- For the Benefit Subject To and Apply To sections, choose options as applicable.
- Select the appropriate Benefit Code based on the descriptions below.
- Ensure the rest of the options for the benefit are completed, as applicable, and Save when finished.
Part 2: Assigning the Benefit and Creating Payroll
-
Go to Employees > Employee Setup > Benefits tab to assign the benefit to the applicable employee.
- Complete payroll for the employee under Employees > Payroll. Complete the following steps to properly enter sick pay and hours:
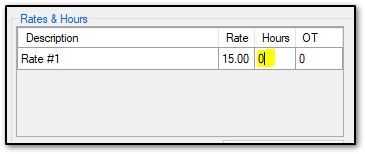
- Put 0 for Hours in the Rates & Hours This will zero out the Regular Pay field.
-
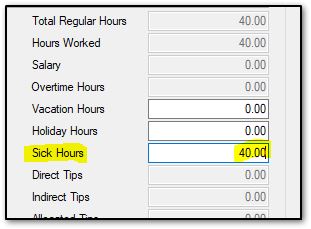
- Enter the correct number of hours for this employee’s paycheck in the Sick Hours. This is the number of hours the employee usually works. 40 will be used in this example.
-
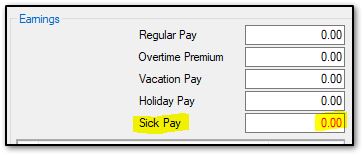
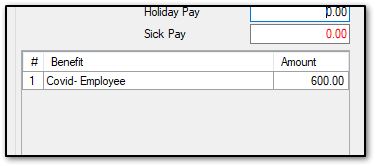
- Put 0 in the Sick Pay field.
-
- The benefit will calculate automatically. If you need to change the amount, do so here.
-
- Ensure the amounts on the payroll screen are correct, and Save when finished.
Part 3: Generating Transactions (Optional)
- If you have Generate Accounting Transactions checked under Employees > Options and you wish to change the accounts associated with the payroll transactions, go to the Transaction screen and change accounts as applicable.

Part 4: Tracking Wages and Hours with the Emergency Paid Leave Report
- Go to Employees > Reports.
- Choose the Emergency Paid Leave. Once the options for the report are set, click Run Report.
- The report will display with the following format:

On a scale of 1-5, please rate the helpfulness of this article
Optionally provide private feedback to help us improve this article...
Thank you for your feedback!