Drake Accounting®: What is the Payment Methods module under the Financial menu?
MICR Bank Accounts are being changed to Payment Methods and offering much more functionality beginning in Drake Accounting® 2021. Instead of selecting MICR or Pre-printed and the check design on the Check Print screen, you will simply select the payment method with the check design selected during setup. Because this screen applies to all payment method types, not just MICR checks, it is a required setup item.
A variety of different methods of payment for employees and vendors can be set up by going to Financial > Payment Methods. These options include check, cash, credit/debit (though DAS does not process these), electronic, and other forms of payment. Each payment method has an account associated with it that would take the place of the cash account set up for the Payables or Employees modules when generating accounting transactions. Cash, Credit/Debit, Electronic, and Other payment types for payment methods are for after-the-fact payments only.
To create a new payment method:
- Go to Financial > Payment Methods.
- Select New.
- Enter a Payment Code. This is a user-made code that is used to identify the payment method from other payment methods. This field is limited to 8 characters and can include letters, numbers, and symbols.
- Enter a Payment Name. This would typically be the name of the bank from which the payment will be drawn.
- Enter Payment Info 1 and Payment Info 2 (optional). This would typically be information pertaining to the bank (address, phone number, etc.)
- Select the Payment Account for which the checks are drawn if you will be generating accounting transactions from employee or vendor payments. If you have not selected to auto-generate transactions, this field is not required and will show a blue validator (
 ) instead of a red validator (
 ).
).
- Depending on what is selected for Payment Type, there will be various fields available:
- If the client uses only ATF payroll, wants transactions generated, and does not want to set up a check design, they can choose Cash type as the default payment method under the GL Accounts tab on the Employee Options screen instead of Check.
- If you are using a check method:
- And have a MICR check design selected in the Check Design drop down:

- Check Information
- Print test of check face on save - Check this option to have a preview of a check display after saving.
- The style and format of the check is determined by selecting the appropriate Check Design from the drop menu.
- Next Check # - Enter the number of the next check to print for this bank account.
- Bank Account - Enter the account number against which the checks are drawn. This is a MICR encoded field and should include all formatting (spaces, dashes, special characters, etc.).
- Bank Routing - Enter the routing number for this bank account. If you do not know the routing number, find it on the bottom of a pre-printed check - the nine-digit number to the left of the account number.
- Fractional Routing - This is the fractional information assigned to this bank account. Identify the fractional routing on a previously printed check for this account - it is usually in small print and consists of two parts divided by a slash. If you cannot find it, your bank can supply your fractional routing number.
- Digits - Some banks require the check number printed on the MICR line to be a specific number of digits. If your bank has this requirement, enter the number of digits required for the check number. Zeros will pad the beginning of the check number to give the required number of digits.
- MICR Line Style - select to print the MICR line in the Business (wide) check format or the Personal Check (narrow) format.
- Payer Information
- Payer Name - Enter the name of the employer who issues checks.
- Payer Info - Enter the payer's address, phone number, etc.
- Security
- Minimum Amount - enter the minimum dollar amount allowed on a check. A "0.00" in this field means zero is the minimum amount. Negative numbers are not allowed in this field.
- Maximum Amount - Enter the maximum dollar amount allowed on a check. A "0.00" in this field means there are no restrictions.
- Void After Days - Enter the number of days until a check becomes stale. Once the number of days entered has passed, the check is considered void. A "0" in this field means there are no restrictions. The Void After Days information does not print on the check.
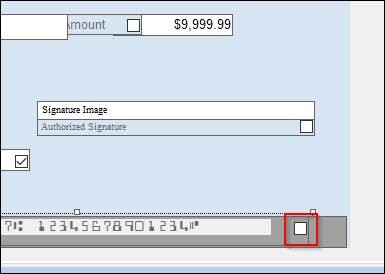
- Signatures Lines - Select to print one, two, or no signature lines.
- And have a pre-printed check design selected in the Check Design drop down:
2.jpg)
- Print test of check face on save - Check this option to have a preview of a check display after saving. The style and format of the check is determined by selecting the appropriate Check Design from the drop menu.
- Next Check # - Enter the number of the next check to print for this bank account.
- Security
- Minimum Amount - Enter the minimum dollar amount allowed on a check. A "0.00" in this field means zero is the minimum amount. Negative numbers are not allowed in this field.
- Maximum Amount - Enter the maximum dollar amount allowed on a check. A "0.00" in this field means there are no restrictions
- Void After Days - Enter the number of days until a check becomes stale. Once the number of days entered has passed, the check is considered void. A "0" in this field means there are no restrictions. The Void After Days information does not print on the check.
- When the payment information is complete, select Save.
If the selected Check Design has the MICR Line disabled, unnecessary fields will be disabled and a blue icon will appear beside the Check Design field.

The MICR Line can be enabled or disabled under the Financial > Check Designer > Check Design tab.
For more information on the Check Designer screen, see Related Links.
On a scale of 1-5, please rate the helpfulness of this article
Optionally provide private feedback to help us improve this article...
Thank you for your feedback!