Drake Accounting®: How do I enter invoices for payables?
To create and view a new Payables invoice:
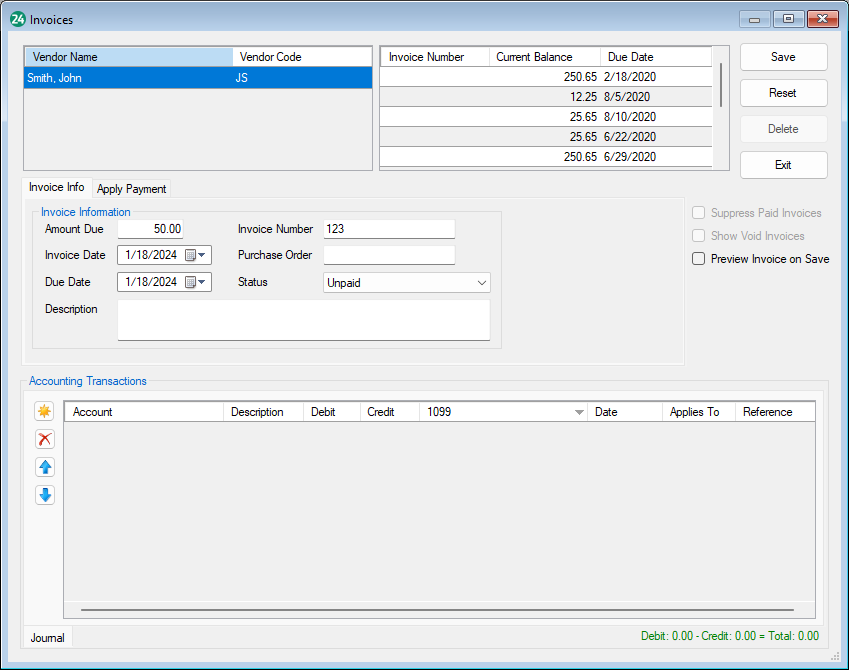
- Go to Payables > Invoices. The Invoices dialog box is displayed.
- Select a vendor from the Vendor list.
- Click New to enter a new invoice.
- Complete the invoice information.
- Amount Due — Enter the total amount due for the invoice.
- If the amount due is a whole dollar amount, it is not required that you enter “.00”.
- Invoice Date — Use the drop list to enter the date of the invoice.
- Due Date — Use the drop list to enter the date the invoice is due.
- Description (Optional) — Enter a description for the transaction.
- This field can be set to autofill with either the vendor code, vendor name, or client account by going to Payables > Options > General Options and selecting the Autofill Invoice Descriptions with check box.
- Invoice Number (Optional) — Enter the number on the vendor’s invoice or any other identifier.
- Purchase Order (Optional) — If this invoice is to be paid using a purchase order, enter the PO (purchase order) number.
- Status (Optional) — Use the drop list to select the status of this invoice.
4.jpg)
5.jpg)
Schedule Live Payment
This section is activated for live invoices (the ATF box is not selected). Use this section to schedule the first payment (or payment in full) for the invoice.
Complete the following fields to schedule a live payment on the Invoices screen:
- Pmt Amt — Enter the amount that is being scheduled for payment.
- Schedule — Enter the date the payment is being scheduled to be made.
- The scheduled payment will display on the Print Checks window (Payables > Check Print) on the day the payment is scheduled or
- Allow the transmission of a payment at Payables > Transmit Direct Deposit.
- You must be partnered with Kotapay, have Firm > Direct Deposit Setup completed, and Payables > Vendor Setup > Direct Deposit must be filled in for the specific vendor for direct deposit to be used.
Record ATF Payment
This section is activated when the ATF box is selected designating the invoice as an After the Fact transaction. ATF payments can be recorded either in the ATF Payment section or by going to Payables > Payments.
Complete the following fields to record an ATF payment on the Invoices screen:
- Pmt Amt — Enter the amount of the ATF payment.
- f there is an outstanding balance after the ATF payment is recorded, the invoice shows as partially paid and additional ATF payments can be recorded by going to Payables > Payments.
- Pmt Date — Enter the date the ATF payment was made.
- Pmt Type — Select the method used to make the ATF payment.
- Check is the default method of payment for ATF payments.
- Check No — This field is available only when the Pmt Type is Check.
- The Check No is a required entry for ATF payments made by check.
- Enter the check number used to make the ATF payment.
Note: At this time, it is not possible to enter a prior payment and schedule a future live payment on the same invoice screen. Use the Payables > Payments screen for additional payment entries.
Additional options:
- Delete — Click to delete a saved invoice with no scheduled live payments, no printed live payment checks, and no recorded (ATF) payments. Invoices with a scheduled live payment, a printed live payment check, or a recorded ATF payment cannot be deleted but can be voided.
- Suppress Paid Invoices— Select this option to suppress paid invoices.
- Show Void Invoices— Select this option to view voided invoices.
- Preview Invoice on Save — Select this option before clicking Save to see the invoice on your monitor (and print) when you click Save. This option remains on until it is turned off.
If no adjustments are needed in the Accounting Transactions section, click Save once all invoice information has been entered.
Once it is saved, select a vendor and click New to enter another invoice.