Drake Accounting®: What are the Posted and Unposted Transactions screens?
The Posted and Unposted screen under Accounting > Transactions shows all transactions you have created. Other modules, such as payroll , accounts receivable, and accounts payable can automatically create transactions as well, if the options are configured to do so.
Transactions cannot be entered directly on the Posted screen unless you go to Accounting > Options and set the Posting Method Type from Normal to Live Posting. The Accounting > Transactions > Unposted and Accounting > Transactions > Posted nodes will be replaced with the Accounting > Live Transactions node.
Otherwise, after entering transactions on the Unposted screen or through other modules, use the Post button to move them to the Posted screen. It is possible, however, to delete or edit transactions from the Posted screen. If the Post button is grayed out, see here.
There are two methods of creating transactions in the general journal:
- Manual entry directly into the Unposted Transactions screen.
- Accounting > Transactions > Unposted
- Automatic production of payroll, payables, and receivables transaction. The options for each module must be configured correctly at:
- Employees > Options
- The Employee > Options screen has an additional option to automatically post transactions.
- Payables > Options
- Receivables > Options
Manual Entry of Journal Transactions:
To manually enter journal transactions:
- Go to Accounting > Transactions > Unposted.
If you do not see any accounts listed under the unposted section drop down, uncheck the option Hide inactive accounts on Firm > User Setup > edit your user ID > Journal Options tab.
- Click
 to add a transaction or press the Insert (INS) on your keyboard.
- If the Prefill Offsetting Entry Amounts Automatically option, located at Firm > User Setup > Journal Options, is checked, two transaction lines are created when is clicked; one for the debit transaction and one for the offsetting credit entry. If you wish to enter transactions into the journal screen with multiple debit entries and a single offsetting credit entry, you will need to uncheck this option.
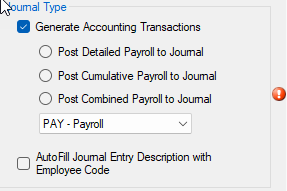
- Select the journal to use for this transaction from the Journal drop list.
| GJ |
General Journal |
| CD |
Cash Disbursements |
| CR |
Cash Receipts |
| PAY |
Payroll |
| BUD |
Budget |
| AJ |
Adjusted Journal |
Note: You can add a custom journal selection by going to Accounting > Options, and clicking on the icon.
- Complete all necessary fields for the transaction.
- Date (Required)
- The date of the transaction defaults to today's date. To edit the displayed date of the transaction, double-click the displayed date then click the
 to access the calendar function. The date selected is used until it is changed or until the Unposted Transactions screen is exited.
- Entity Code (optional)
- To associate this transaction with a particular employee, AP vendor, or AR customer, double-click the Entity Code field and select the appropriate option
- Account (Required)
- Click the Account field to display the account selection list
- Select the appropriate account for this transaction from the list of level 0 (postable) accounts.
- Debit: If this transaction is a debit, enter the amount.
- Credit: If this transaction is a credit, enter the amount.
- Each transaction must contain either a Debit or Credit, not both.
- All Debits and Credits must balance. Generally this is done with an off setting entry.
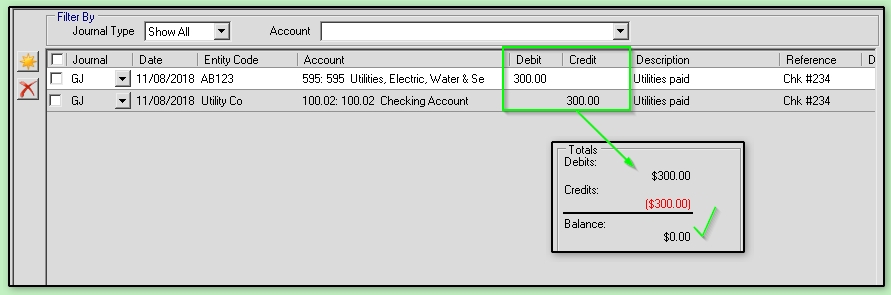
For example: Client AB123 pays their utility bill from their checking account. The example below shows how the transaction may look. The bottom right of the window shows Totals for all Debits and Credits. If a balance is shown, check for missing entries.
- Description (Recommended)
- Enter the description for this transaction.
- If you have previously entered descriptions, the software stores previous descriptions and attempts to prefill the field with one of these descriptions as you type. If the desired description appears, press the TAB key to accept it and move to the next field.
- Reference (Optional)
- This alphanumeric field can be used however you like.
- If entering check information directly into the Unposted Transactions screen, you may want to use the Reference field for check numbers.
- Division (Optional)
- Select the division associated with this transaction. The drop list displays the list of divisions created in Client > Edit > Divisions.
- Clickto continue adding transactions.
- Once all journal entries have been made, verify the information.
- Click Save.
Caution: If you exit the window without saving, the transactions will not be written to the database. A "Question" window will display, providing an additional chance to save your entries.
Note: You cannot post transactions in the current year if you have not completed the year-end close process in the prior year. See Related Links for details on closing out the year.
Status of Months
Use the Status of Months section to aid in maintaining a journal that is in balance.
When you go to Accounting > Transactions > (Posted or Unposted), you will see a section on the right side of the screen that shows the current balance (Debits - Credits) of journal entries.
Select a month to display the transactions that have been entered for that month, as well as that month's balance information.
Select the Show All radio button to display all transactions entered and the balance information for all transactions currently in the journal.
Monthly statuses displayed are:
- Green - Balanced
- Red - Invalid
- Gray - No entries
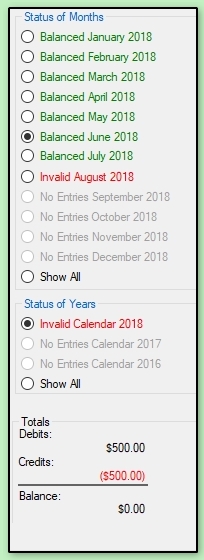
Note: Similar to the Status of Months, the Status of Years shows the calendar years that are in balance.
Editing a Journal Entry
- Go to Accounting > Transactions > (Posted or Unposted).
- Select the journal entry field to be edited.
- Make the changes as needed.
- The balancing transaction(s) may also require editing.
- Click Save on the Unposted screen or Confirm Edits on the Posted screen.
Deleting a Journal Entry
- Go to Accounting > Transactions > (Posted or Unposted).
- Select the check box beside each transaction to be deleted and click
 or press the Delete key on your keyboard.
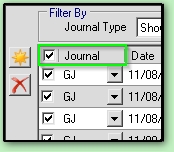
- To select all transactions, check the box to the left of the Journal column header.
- Click Yes to confirm.
- Click Save to finish.