Drake Accounting - Back Up Client Files
Article #: 15056
Last Updated: July 22, 2025

The backup path - where backups are saved:
-
The Drake Accounting backup and restore processes use the same global path (Firm > Firm Information Setup > Paths). The default global path is \DrakeAccounting20YY\Backups, and it's installed with the software.
-
It is not recommended to change the global path to back up or restore individual clients. That can result in backup files spread over several locations, making it likely you won't be able to find the backup file you need. Both Backup and Restore use the same global path.
-
If you need to back up or restore using a location other than the global location (a flash drive or removable disk, for example), you can set a temporary path at the dialog box when you begin a specific backup or restore session. When you close that session, the temporary path is eliminated, and the global path is displayed in the next backup or restore.
-
-
Drake Accounting creates a separate, zipped backup file for each new backup. It does not overwrite previous backups. The backup file name reflects the date and time the backup was made.
-
It is recommended to create a backup folder before setting a backup path.
Caution Drake Accounting will not allow you to restore a client that was backed up on the root of the C:/ due to several restrictions caused by Windows.
Watch the Backing Up Clients video for a demonstration.
Backing Up a Client File - Three Options
-
Manual backup. Manually back up any client at Client > Backup:
-
Backup location
-
The current global backup path is displayed in the lower-left corner of the Backup File Selection screen. If the path reads NO PATH SET, a global path must be selected before you proceed.
-
To use a different path for this backup session only, click the Change Path button. From the Browse for Folder window, select the appropriate drive or folder. It is recommended to create a separate folder specifically for Drake Accounting backups. You can do this easily by clicking the Make New Folder button at the bottom left. Click OK to save your path for this backup session or Exit to exit without saving the path. Any selection you save will revert to the global location when you exit the Backup screen.
-
-
Backing up.
-
Select the client or clients you want to back up. Select the check box next to Client Code if you wish to back up all of the clients at one time.
-
After selecting the clients, click Backup to begin the process. A progress bar will appear at the bottom of the Backup Client(s) screen and will disappear upon completion.
-
-
-
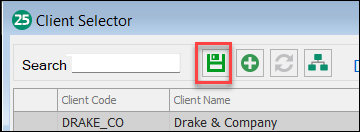
Quick backup. Quickly back up the active client using the Home screen Backup icon shortcut on the Client Selector. Click the icon to back up your current active client to the global backup location only. The status bar at the bottom of the Drake Accounting Client Selector screen will show the updated backup date and time upon completion.

-
Auto Backup. At Firm > Firm Information Setup > Automatically Backup Client Files, you can select and save options to automatically back up a client file whenever you open it (Start of) or close it (End of Client Session). You can also choose the Max Number of Backups Per Client. Auto backup reduces the additional data entry needed to bring a restored client file up to date. If your restored backup was made a month ago, you have to enter a month's data to update the client. A restored backup made the last time you worked on the client can be updated with much less effort.
