Drake Accounting - Restore a Backed Up Client File
Article #: 15067
Last Updated: December 05, 2024

The backup and restore processes use the same global path, located at Firm > Firm Information Setup > Backup Path. The default global path is \DrakeAccounting20YY\Backups, and it's installed with the software.
It is not recommended to change the global path to back up or restore individual clients. That can result in backup files spread over several locations, making it likely you won't be able to find the backup file you need. Both Backup and Restore use the same global path.
If you need to back up or restore using a location other than the global location (a flash drive or removable disk, for example), you can set a temporary path at the dialog box when you begin a specific backup or restore session. When you close that session, the temporary path is eliminated, and the global path is displayed in the next backup or restore.
Note Drake Accounting will not allow you to restore a client that was backed up to the root of the C:/ due to several restrictions caused by Windows.
The zipped backup file you intend to restore must be inside a folder on the destination drive. For example, you can't restore C:\TEST_CO_2016-05-13_12-55.ZIP, but you can restore C:\DrakeAccounting20YY\Backups\ TEST_CO_2016-05-13_12-55.ZIP.
Drake Accounting creates a separate backup file for each new backup. It does not overwrite previous backups. The backup file name reflects the date and time the backup was made.
Watch the Restoring Client Files video for a demonstration.
Restoring a Client File
Important Before restoring a client file, make sure Drake Accounting is updated. Don't try to restore a backup made from a more recent DAS version than the DAS version to which you are restoring.
To restore a client file:
-
Go to Client > Restore.
-
The current global backup path is displayed at the bottom of the dialog box. If the path reads NO PATH SET, a global path must be selected before you proceed.
-
To use a different path for this restore only, click the Change Path button. From the drive drop list, select the drive you want to use. The directories available on that drive appear in the Directory (folder) panel below. Double-click a directory to display the folders it contains. Click OK to save your path for this restore session or Cancel to exit without saving the path. Any selection you save will revert to the global location once you exit the Restore dialog box.
-
-
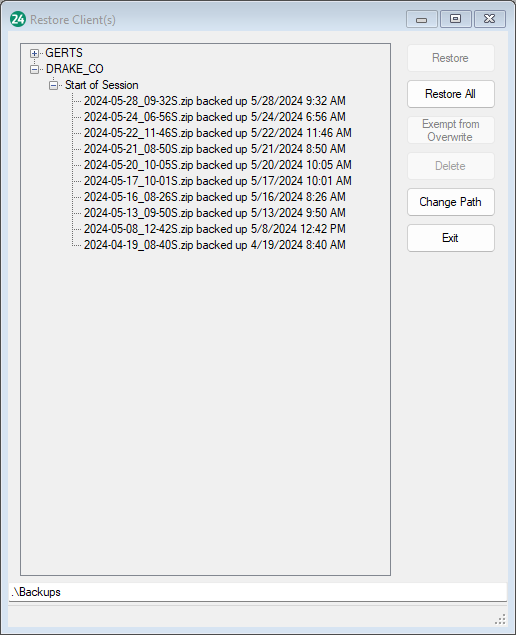
Select the client you would like to restore. Available backups for that client appear in the lower window. You are given six different options: End of Session, Start of Session, Year End Close, Bank Reconciliation, Posting, or Manual. Once you select a restore option, the file names display the date and time of the backup. Select the file you want to restore, such as 2020-12-003_09-23s.zip backed up on 12/3/2020 09:23AM, in the screenshot below and click Restore to begin the process.

When the process is complete, you're advised the client has been successfully restored at the bottom of the dialog box.
Note When restoring a client file, it is no longer required that you have to delete the existing client file before performing the restoration.