Drake Scheduler - Private Appointments
Article #: 13099
Last Updated: December 05, 2024

The Drake Scheduler provides an option to make appointments private, preventing other preparers from accessing the detail of the appointment. When looking at the preparer’s calendar, it will display Private to others and they will be unable to open it.
To access the Scheduler select Tools > Scheduler or click on the Scheduler icon on the main screen of the software.
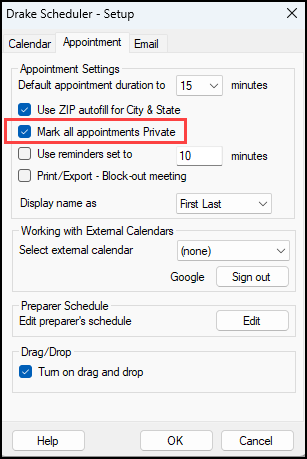
To make all appointments private, complete the following steps:
-
Open the Scheduler
-
Click the Setup icon on the toolbar and select the Appointment tab.
-
Select Mark all appointments Private.
-
Click OK.

To make an individual appointment private rather than all appointments, complete the following steps:
-
Select New Appt or select to edit an existing appointment.
-
Select Private Appointment on the Appointment Detail dialog box.
