Drake Tax - Digitally Sign Tax Documents with a Signature Pad
Article #: 12518
Last Updated: December 05, 2024

Signature pads can be used beginning with Drake Tax Software 2013.
Watch the video E-Sign for a demonstration.
The signature pad and preparer’s signature must be set up before a document can be e-signed. See Related Links below. Only those forms permitted by the taxing authority can be e-signed. In an individual return, for example, Form 8879 (e-file authorization) can be e-signed, but the return itself cannot. See Federal Forms - Drake e-Sign (in-Person or Online) for a list of return types and e-sign form.
Caution The item Require E-Signatures on Electronically Signable Forms (1040 Only) under Setup > Options > EF is available for those preparers who use a signature pad in the office to gather electronic signatures from their clients. A signature acquired through e-Sign Online via Drake Portals will not clear the Esign message in view mode in any circumstance.
Select and e-Sign Documents from Drake Enhanced View Mode or Basic Print Mode
-
To e-sign a document, view the return and select any documents that are eligible to e-sign. You can select all return documents for the PDF, but only those pages with an approved signature line will be eligible to e-sign.
Note To e-sign the 8879, enter the date on the PIN screen, but leave the ERO’s PIN signature blank until all the documents to e-sign have been saved in Drake Documents.
-
Once all documents are selected, click the Sign icon.
-
In the Electronically Sign Return dialog box you can choose to password protect or add a watermark to the document, and whether to Sign Now or Sign Later. Then continue below.
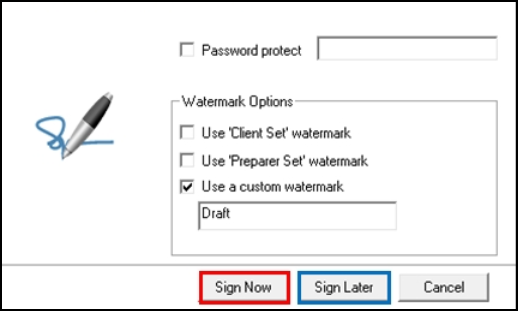
Sign Now
When you choose to Sign Now, you are prompted to save the documents in the Drake Documents default location. Click Save to accept this location or browse to a different location and Save. From here, the e-Sign PDF opens. Follow these steps to e-sign the return.
-
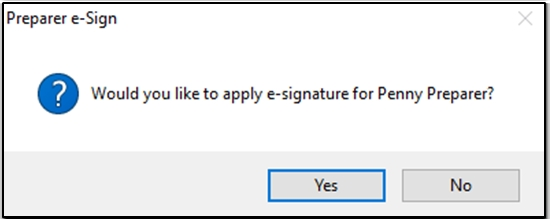
A dialog box opens to verify the name of the preparer.
-
This step is the "Rubber Stamp" option which allows you to apply the saved preparer signature to all preparer signature fields on the return.
-
-
If correct click Yes and your saved signature and today’s date are applied to the document. The signature becomes part of the PDF document and stays with it if the document is printed or emailed.

-
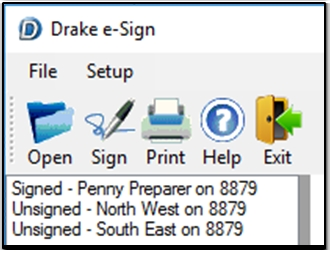
The Drake e-Sign window displays the saved documents. In this example, the 8879 has three signature lines: Preparer, Taxpayer, and Spouse. The preparer has signed. Unsigned documents can be signed at a later date. See Sign Later, below.
-
Select the next unsigned document and click the Sign icon.
-
If the document requires a taxpayer signature, the Drake e-Sign Capture dialog box opens.
-
Signature pads with an LCD window, may show Next, Clear, and OK which correspond to the buttons in the dialog box.
-
-
Have the taxpayer sign the signature pad and press OK to apply the signature to the document, or you can click Apply Sig in the dialog box to apply the taxpayer’s signature.
Sign Later
If you have previously saved an e-sign PDF for later signing, you can reopen it at any time for signing from either View mode in the taxpayer's return or from Drake Documents. Follow these steps.
-
Open the saved e-sign PDF.
-
From taxpayer's return:
-
View the return and click the Sign button on the toolbar.
-
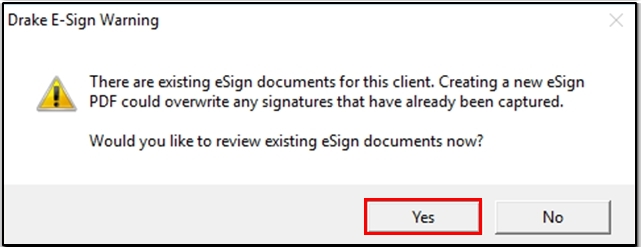
No document selection is necessary. When prompted to "review existing" select Yes.
-
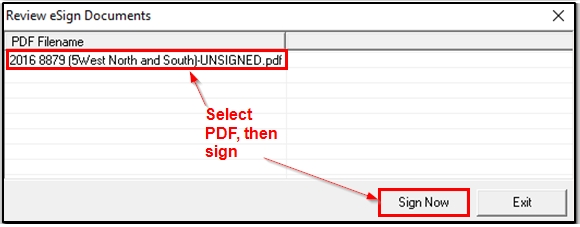
The Review eSign Documents dialog box is displayed. Select the desired PDF, click Sign Now and go to step 2 below.
-
-
From Drake Documents:
-
Open the taxpayer's folder in Drake Documents.
-
Select the e-sign PDF (an e-sign PDF is identified in the Drake Documents Type column as a Signed.pdf or Unsigned.pdf file).
-
Click the Sign button on the Drake Documents toolbar, and go to step 2.

-
-
-
Rubber Stamp.
-
If you are set up to use the rubber stamp, you are prompted to apply your own e-signature. Select Yes to apply the stamp, or No to proceed without the stamp (you can still use the signature pad yourself to sign each document).
-
If your rubber stamp is not set up, or if there are no preparer signatures in the e-sign PDF, there is no rubber stamp prompt.
-
-
Signature Pad.
-
The Drake e-Sign window is now displayed. Activate the signature pad by selecting a signature from the left panel and clicking the Sign toolbar button (or double-click a signature in the left panel or double-click a blue e-signature field displayed on the document).
-
The Drake e-Sign Capture dialog box appears. Direct the appropriate taxpayer to sign on the signature pad. Click Apply Sig to capture the signature, or Clear to clear it before capture.
-
-
Continue until all the signatures you want are captured and appear in the document. If you do not complete all signatures now, you can use these same steps to continue later.
Note The digital signature setup process is covered in Drake e-Sign In Person - Signature Pads.
You cannot change a signature after it has been applied. You must start over by recreating the e-sign PDF.
No Signature Fields Found displayed in the left panel of the Drake e-Sign window indicates there are no digital signatures in the e-sign PDF. You may have created the e-sign PDF with documents that either:
-
aren't eligible to be digitally signed
-
that bear only a preparer's signature blocks, for which the preparer digital signature fields were not created.
-
This can occur when a preparer who is set up for the Alternative Electronic Signature has also completed the ERO's PIN signature field on the PIN screen in the return before creating the e-sign PDF.
-
If both conditions are present when an e-sign PDF is created, the preparer digital signature fields are not created.