Drake Accounting - DAS 2025 Setup
Article #: 20057
Last Updated: November 03, 2025

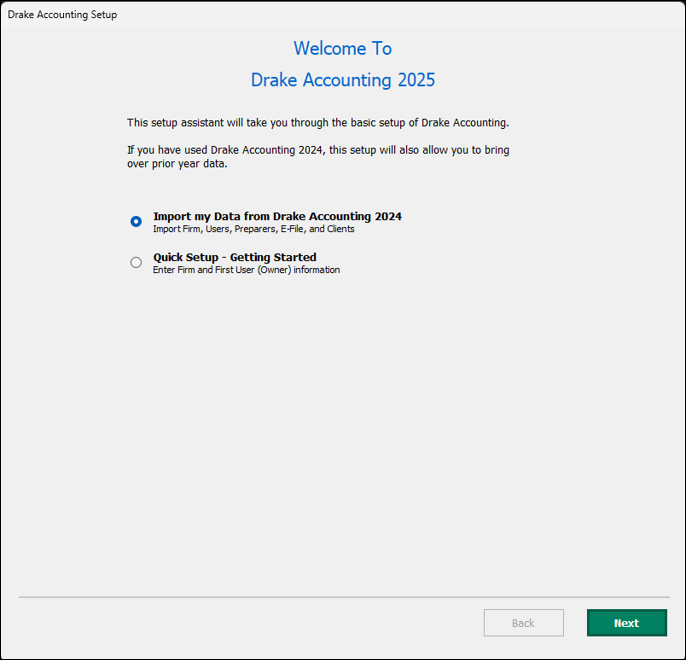
Starting in 2025, setup for Drake Accounting has been simplified. When initialized, the Welcome to Drake Accounting 2025 screen will open.
-
Import my Data from Drake Accounting 2024 - Select this option if you are a previous client of Drake and want to pull over prior year data from Drake Accounting 2024.
-
Quick Setup - Getting Started - Select this option if you are a new user or want to input data manually
Importing Prior Year Firm Data
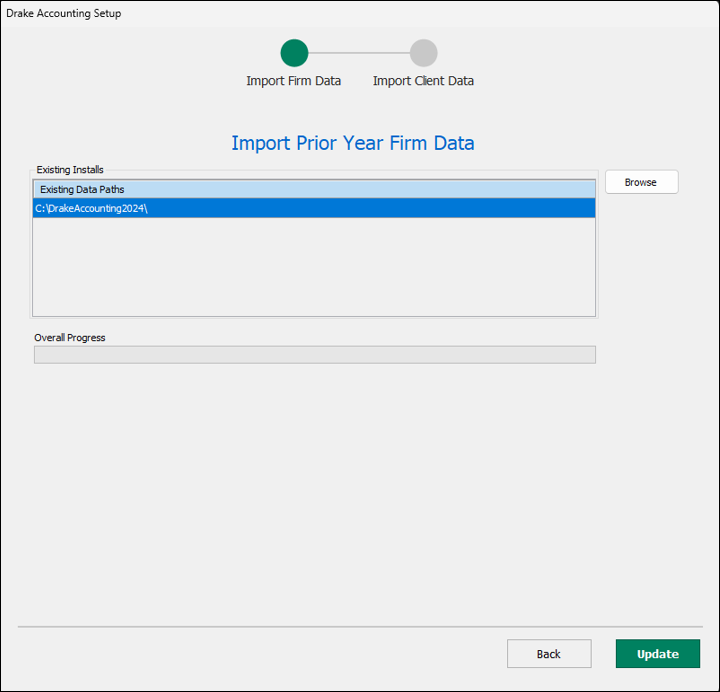
After selecting Import my Data from Drake Accounting 2024 the Import Prior Year Firm Data screen displays.
-
All Drake Accounting 20PY instances that Drake Accounting 20CY detects will display under Existing Installs.
-
Click Browse if the path was not detected.
-
-
Once a desired path is selected, the Back and Update buttons will become active.
-
Click Update to update with the prior year information. Click Back if changes need to be made or to skip updating prior year information.
-
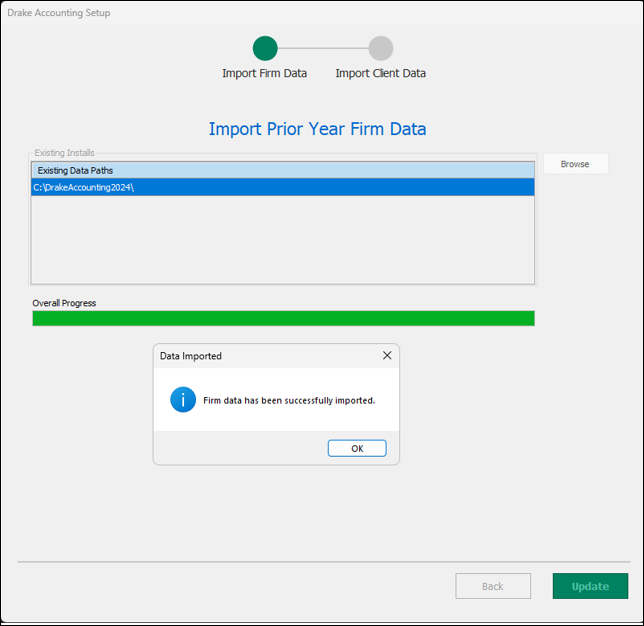
The progress bar will move to show progress of importing the data and a message box will appear confirming data was imported.
-
Once firm information is updated, you will have the option to update prior year client data.
Update Prior Year Client Data
Note To skip importing client data, click Skip at the bottom of the screen. Client data can be imported at a later date through Client > Update Prior Year.
Caution Once a client has been brought over to Drake Accounting 2025, do not continue to enter payroll in the prior-year
Drake Accounting program. Close all other instances of Drake Accounting before updating prior year clients. Only Drake Accounting 2025 should be running.
-
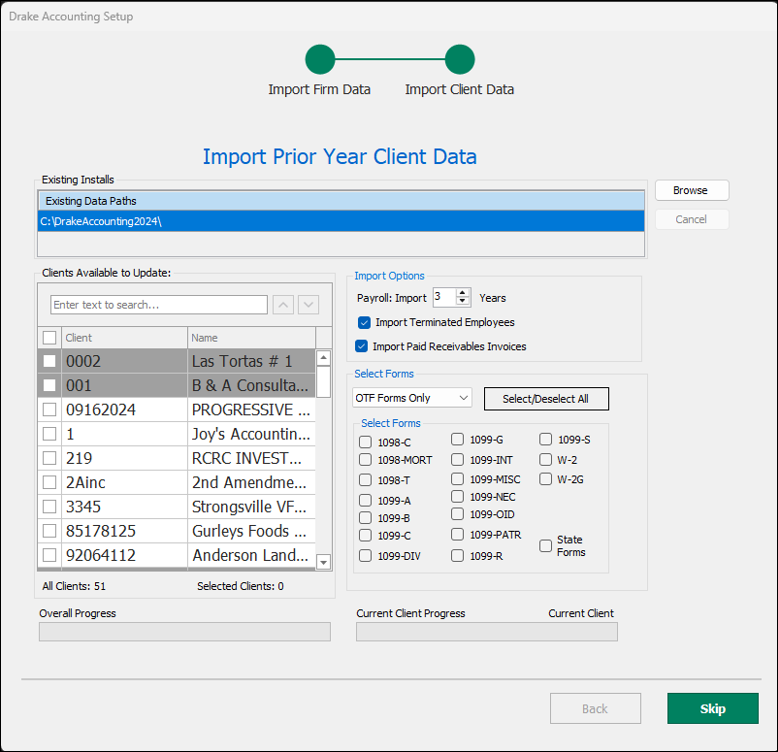
In the Import Prior Year Client Data window, all locations of Drake Accounting for the specified year are displayed under Existing Data Paths.
-
Select the location of the client files to update to the Drake Accounting 2025 program by clicking the location under Existing Data Paths.
-
If you don't see the desired location, click Browse to search your computer for the proper location.
-
-
The client files in the selected location are displayed under Clients Available to Update. Select the individual client files by clicking the box beside each client you wish to convert or click the check box beside the Client column header to select all clients in the selected location.
-
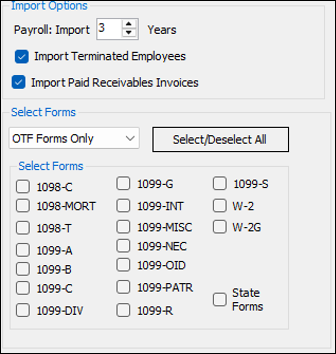
You can choose to bring over on-the-fly forms, non-on-the-fly forms, or both. Select the applicable option from Import Option drop menu.
-
If you select Non-OTF Forms Only, the only options available are Forms W-2, 1099-MISC, and 1099-NEC.
-
-
If you wish to update any on-the-fly Forms W-2, state forms, and Forms 1098/1099, check the applicable forms.
-
If you wish to update payroll data, select the number of years to bring over payroll information under Import Options.
-
To not import terminated employees from Drake Accounting 2024, clear the Import Terminated Employees option. This is selected by default.
-
-
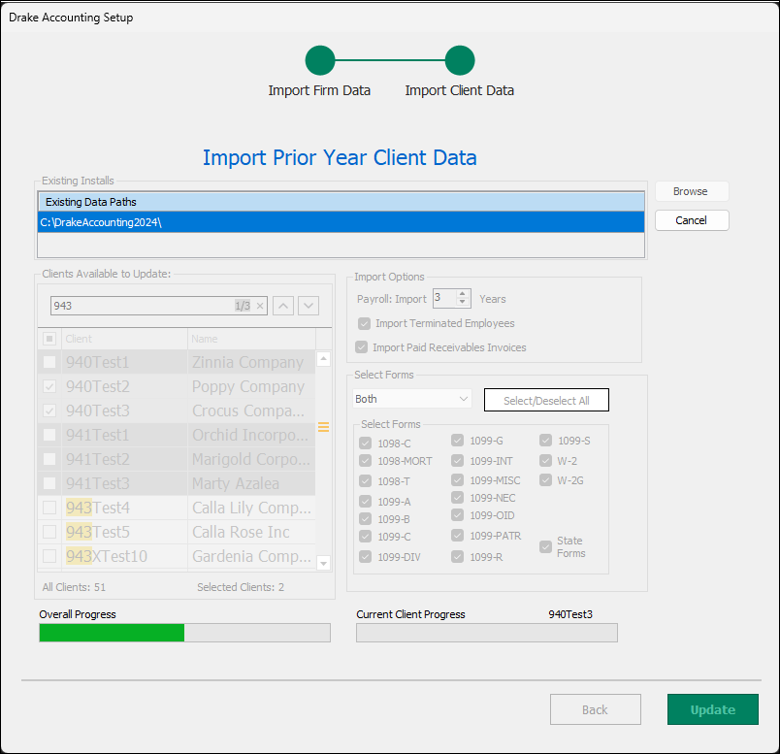
Click Update. While updating, Overall Progress shows total progress in importing all chosen clients and Current Client Progress shows the progress for the current client being imported.
-
When the process is completed, click Exit.
Quick Setup
The Quick Setup allows new users to enter their basic firm information and create the Owner Account. E-file information can be completed in the Firm Information Setup screen after this process.
Important Required fields have red labels and will turn green when all requirements are meet. Some fields will have additional requirements and will have the normal red validator with a tool tip to provide additional context. The Next button will remain disabled until all information is completed.
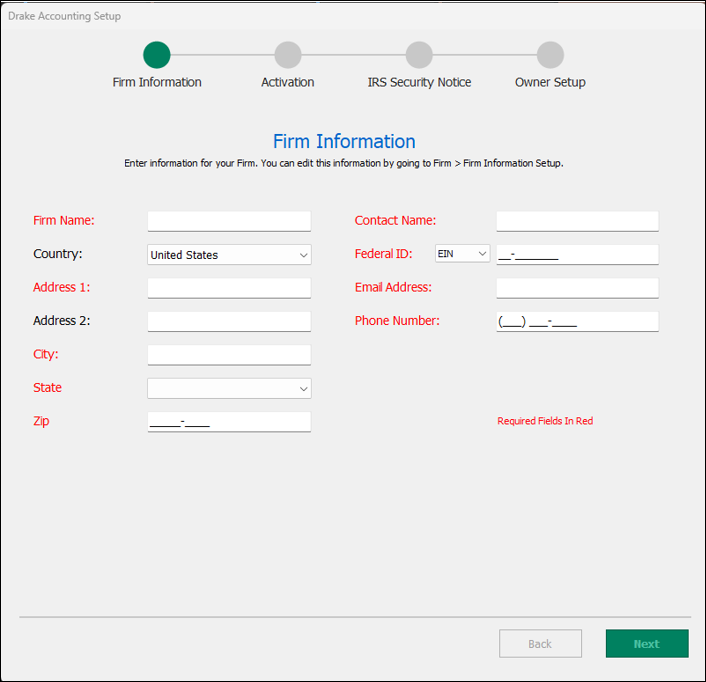
If you choose the Quick Setup option, the Firm Information Setup screen will display.
-
Complete all red fields.
-
Once complete, the Next button will activate.
-
Click Next.
-
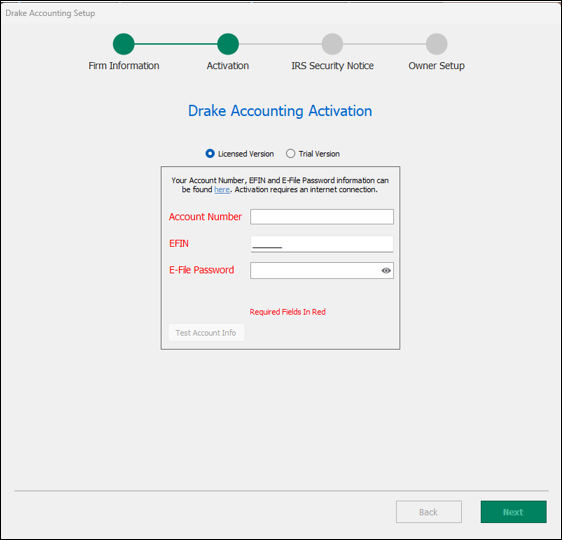
The Drake Accounting Activation Screen will display.
-
Select the Licensed Version or the Trial Version.
-
Licensed Version
-
Fill out the Account Number, EFIN and E-File Password to activate a licensed version of Drake Accounting. This information can be found by logging in to support.drakesoftware.com.
-
(optional) Test the information by clicking Test Account Info.
-
-
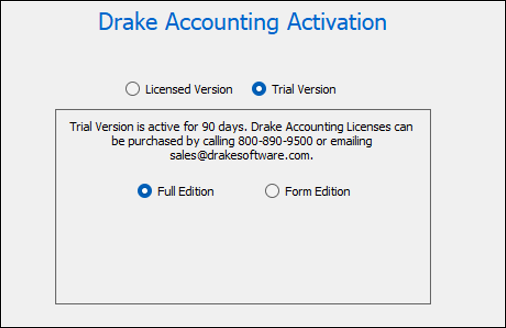
Trial Version
-
Trial Versions last for 90 days.
-
The Full edition will give access to all aspects of Drake Accounting.
-
The Forms Edition has access to data entry and e-filng on, not to accounting or payroll.
-
-
IRS Security Summit
The IRS Security Notice will display once the Firm is setup. This is a required security notice from the IRS, informing users how to keep their information secure. Drake Accounting recommends that users read all three screens.
Owner Setup
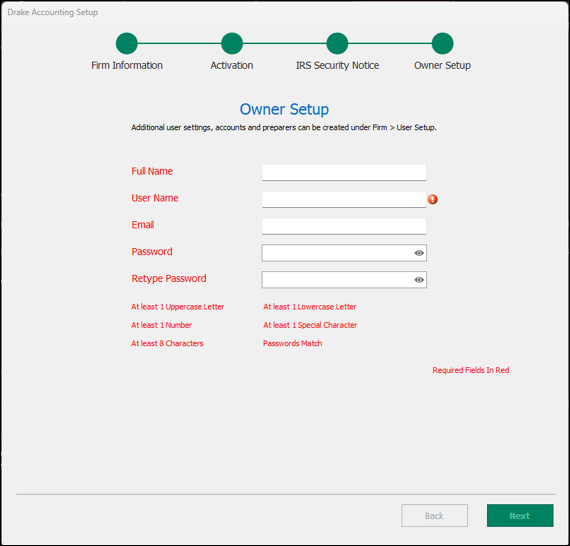
The first user in Drake Accounting must be an Owner. All information on this screen must be completed before moving on.
-
Full Name : Type in the owner's name.
-
User Name: Create a username for the owner. The Username or Email will be used to log in to Drake Accounting.
-
Email: Ensure you have access to the email you choose as password assistance will be sent to this email.
-
Password: Create a password using the guidelines listed in red. Once all specifics are met, theNext button will activate.
-
Click Next.
Owner Setup - Security Questions
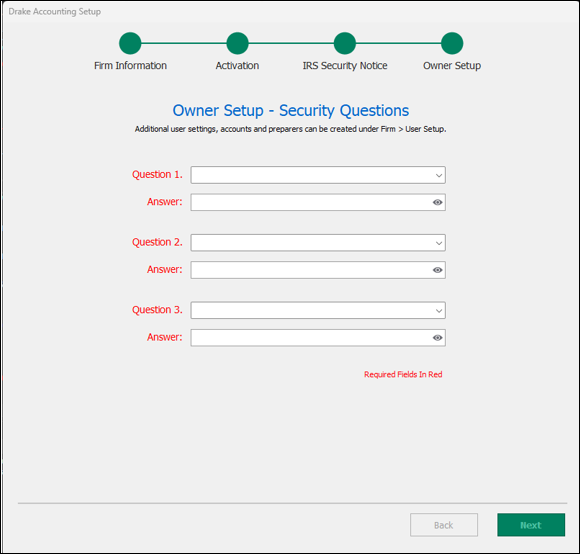
This screen is required. Users need to remember the answers to these questions, as they are used when resetting passwords.
Important The program will not allow you to choose the same question each time. You must choose three different questions.
Owner Setup - MFA
Drake Accounting allows users to use either an Authenticator Mobile App or Yubikey to set up multi-factor authentication.
Important If you do not intend to use multi-factor authentication, click Skip to skip this screen.
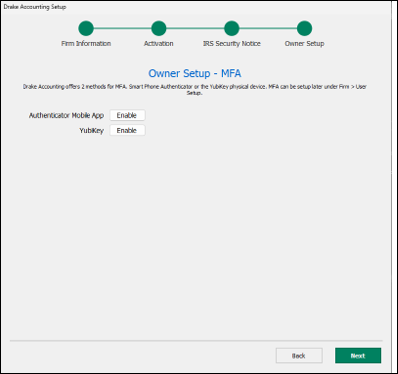
Authenticator Mobile App
A mobile authenticator app will give users a QR code to scan with their mobile phone to setup MFA.
YubiKey
YubiKey is a physical device MFA vendor, most commonly a USB key that you insert into the computer. To setup a YubiKey, select the YubiKey Code field and insert the device into the machine and a string of characters should populate in the field.
Important Some YubiKeys have a button that must be pressed for the device to receive the key. Do not alter the contents of the YubiKey code field.
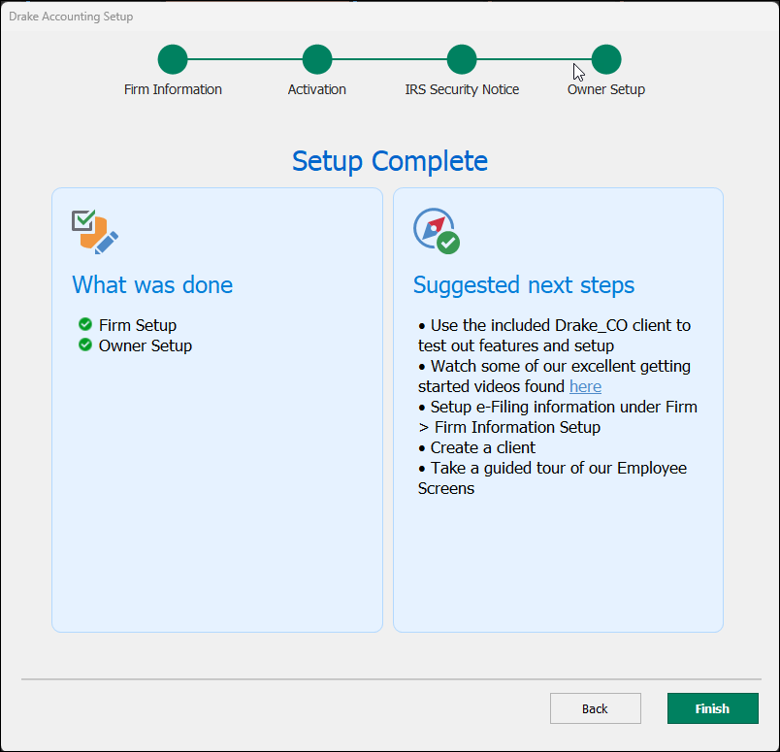
Setup Complete
Once Setup is complete, press Finish to login for the first time.
