Drake Hub - Staff
Article #: 18847
Last Updated: March 24, 2026
![]()
Use the Staff tab to add, edit, delete, or deactivate staff members, or configure staff member access to Drake Software applications.
Note The Staff Member set up in Drake Hub does not replace Setup > Preparers and Users in Drake Tax or User Setup in Drake Accounting.
Add Staff Member
To add a new staff member, follow these steps:
-
Click Add Staff, above the list of existing staff members.

-
Complete the required fields, including the staff member's First Name, Last Name, Email Address.

-
If you do not want to send an onboarding email, you can toggle off the option Send Onboarding Email.
-
Assign Clients (optional).
-
Click Submit.
Caution Each staff member must have a unique and valid email address.
The new staff member is created and displayed in the list of all staff members. Note that this only creates an account with the role of "User" in Drake Hub. If this individual should have admin level access to Drake Hub or access to any other application, access must be granted by editing the staff member and selecting additional applications and roles.
Edit Staff Member
To edit an existing staff member, follow these steps:
-
Go to the Staff tab.
-
Locate the staff member in the list.
-
You can also filter or search for staff members in the list.
-
-
In the Actions column, select the menu and click Manage Staff User.

-
Staff User Account details are displayed.
-
Click the menu and select Edit Account.

-
Make changes to their first name, last name, email address, or assigned clients, and click Save.
Tip Also see Drake Hub - Change Email Address.
Delete Staff Member
To delete an existing staff member, follow these steps:
-
Go to the Staff tab.
-
Locate the staff member in the list.
-
You can also filter or search for staff members in the list.
-
-
In the Actions column, select the menu and click Manage Staff User.
-
Staff User Account details are displayed.
-
Click the menu and select Delete Account.

Important Use caution when selecting this option.
Deactivate Staff Member
To deactivate an existing staff member, follow these steps:
-
Go to the Staff tab.
-
Locate the staff member in the list.
-
You can also filter or search for staff members in the list.
-
-
In the Actions column, select the menu and click Manage Staff User.
-
Click the menu and select Change to Inactive.

Application Access
Configure
To configure their access to Drake Apps, such as Drake Hub and the Drake Software Support Website, follow these steps:
-
Go to the Staff tab.
-
Locate the staff member in the list.
-
You can also filter or search for staff members in the list.
-
-
Under the Actions column, select the menu and choose Manage Access.

-
In the Application Access section, click Manage Access.

-
Select the application from the drop list.

-
Select the Roles & Permissions for the application (or Select All to allow full access).

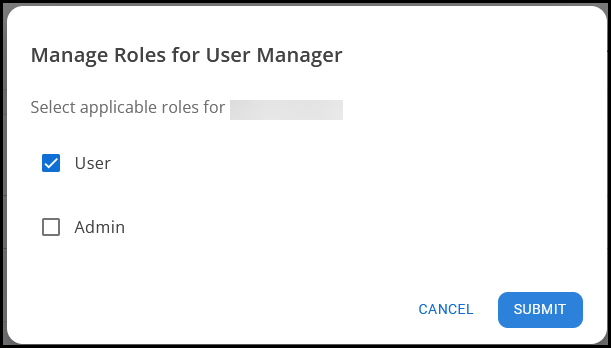
-
Click Submit.
Edit
To edit their access to Drake Apps, such as Drake Hub and the Drake Software Support website, follow these steps:
-
Go to the Staff tab.
-
Locate the staff member in the list.
-
You can also filter or search for staff members in the list.
-
-
Under the Actions column, select the menu and choose Manage Access.
-
Existing permissions for each application are shown.
-
Click the Edit Roles icon (pencil) to edit permissions for an application.

-
Select the Roles & Permissions for the app.
-
Click Submit.
Revoke
To remove access to a Drake Application, follow these steps:
-
Go to the Staff tab.
-
Locate the staff member in the list.
-
You can also filter or search for staff members in the list.
-
-
Under the Actions column, select the menu and choose Manage Access.
-
Existing permissions for each application are shown.
-
Click the Revoke Access icon (trashcan) to revoke access to that application.

-
A pop-up asks you to confirm your decision. Click Revoke.
Roles
Available roles for Drake Hub include:
-
User - A user will only see the clients and return statuses that are assigned to them in the client list and workflow, unless you also enable the option Manage All Clients (below). Users cannot add other staff members.
-
Admin - An admin sees all clients and return statuses in the client list and workflow. Admins can add other staff members.
-
Manage All Clients - Allows a user to see all clients and return statuses in the client list and workflow. This option is enabled by default for Admin users.
Available roles for the support site include:
-
Admin (allows access to all of the items listed below)
-
Account & Banking
-
User (should be chosen when the person is not an Admin, but needs access to other sections)
-
EFIN Management
-
Online EF Database
-
Efile Password
-
Reports > E-file Lookup
-
Reports > Bank Products
-
Reports > MOM
-
Reports > Add on Fee
-
Reports > Protection Plus
-
Reports > DIY Referrals
-
Reports > ABC Voice
-
Reports > Contact List
-
Reports > Manage Saved Reports
-
Reports > Manage Suppressed Returns
-
Reports > Returns
-
Reports > Checks
-
Reports > Fees
-
Reports > 94x
-
Reports > Fraud
-
Reports > EF Summary
-
Reports > Preparer Summary
-
Reports > Zip Code Summary
-
Reports > Returns Summary
-
Reports > Returns by Ack Summary
Available roles for Drake Portals include:
-
User
-
Owner
-
Admin
Multi-Factor Authentication (MFA)
See Drake Hub - Multi-Factor Authentication (MFA) Settings.
Passwords and Security Questions
See Drake Hub - Password and Security Questions for details.