Drake Pay Manager
Article #: 18332
Last Updated: November 26, 2025

The Drake Pay Manager is a web application where you can view detailed information about transactions processed through Drake Pay. After you have applied and been approved for Drake Pay, configure access for each preparer by adding the Drake Pay Manager application to your Drake User Manager.
An administrator must configure access to the Drake Pay Manager by updating permissions for staff or users through Drake Hub or the Drake User Manager (multi-sites). See the following for detailed steps on configuring access:
After access has been configured, launch the application from Drake Hub (or the Drake User Manager) or by going directly to https://drakepay.drakesoftware.com/manager.
Overview
The Drake Pay Manager has the following tabs:
-
Transactions
-
Payment Requests
-
Deposits
Transactions
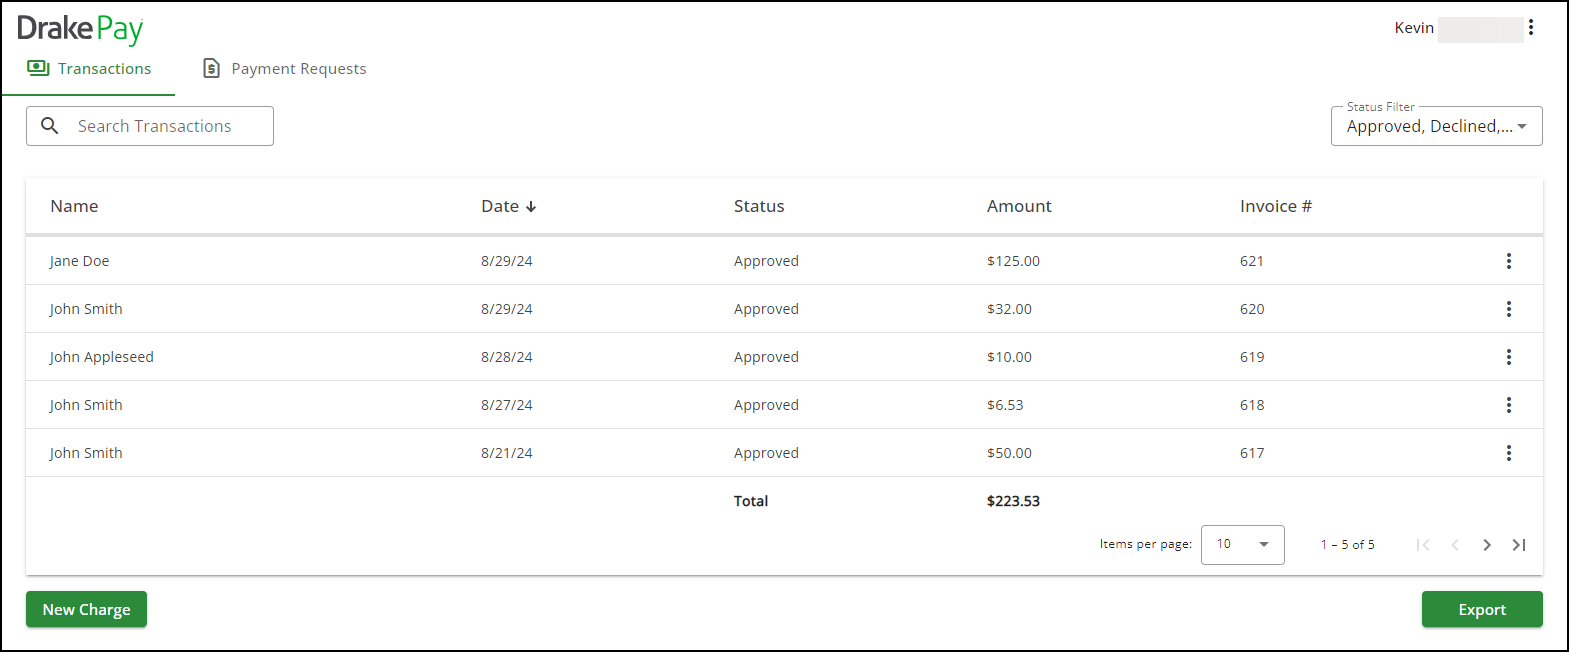
View transaction statuses and details, or collect a New Charge (payment) for in-person clients. The Transactions tab lists each attempted transaction and its details, including the Date, Status, and Amount. Use the Search field or apply a Status Filter to easily locate transactions.
From the three dots menu, you can choose Details, Resend, or Cancel.
Some payments cannot be cancelled:
-
If the payment Status is Paid, e-File Accepted, ACH Initiated, In Progress, or ACH Complete it cannot be cancelled.
-
If the payment Status is Pending e-File, it can be cancelled, however, this also removes Drake Refund Pay from the return.
-
If the payment Status is Sent, it can be cancelled.
After cancelling, you would need to send a new payment request. At that time, the taxpayer can choose to pay by Debit or Credit Card, or complete the Drake Refund Pay application. See Drake Pay - Payment Requests - Taxpayer View or Drake Pay - Drake Refund Pay for details.
*The statuses of e-File Accepted and Pending e-File are only used for firms who have been approved to offer Drake Refund Pay. See Drake Refund Pay - Overview and FAQs for details.
You can view additional transaction details by clicking the transaction row.

Payment Requests
View payment request details and send digital invoices to clients, which can be paid via a unique Drake Pay payment page.
Deposits
View detailed information about deposits to easily reconcile the amounts that you received with the transactions that are included in that deposit.
Refund
If a payment needs to be refunded, click on the transaction row, then click the Refund button at the bottom-left of the Transaction Details window. You can choose Refund for credit card payments, debit card payments, and ACH transactions.
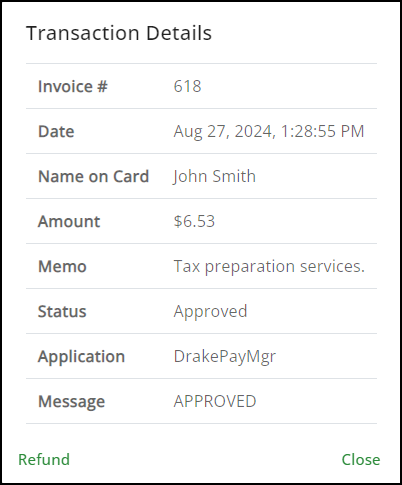
When you select Refund, if the transaction has not been processed, it will be voided (no fees assessed). If the payment has already been processed, it will be refunded (subject to fees).
Collecting Payments
The Drake Pay Manager can be used to collect payment for services that are not directly related to tax return preparation; however, payments must be collected remotely (via a sent invoice and the Drake Pay payment portal) or by manually entering client credit or debit card information.
Important The Drake Pay Manager does not support point-of-sale (POS) devices.
Remote Transactions (Payment Requests)
With Drake Pay, you can send payment requests to clients, allowing them to pay their bill wherever they are and at their convenience.
When you send a payment request to a client, the client receives an email, stating who the charge is from, how much they owe, and a payment link. Upon opening the link, the client is redirected to a Drake Pay payment page and prompted to pay the amount due by entering their credit card, debit card, or ACH information. Once the payment is submitted, the client receives a PDF receipt of their transaction via email, and the preparer receives an email confirming the payment. Payment requests can be cancelled (prior to being paid).
To request a payment using the Drake Pay Manager:
-
Log in to the Drake Pay Manager using your Drake Software credentials. (See Drake Pay Manager for information on granting access to the Drake Pay Manager.)
-
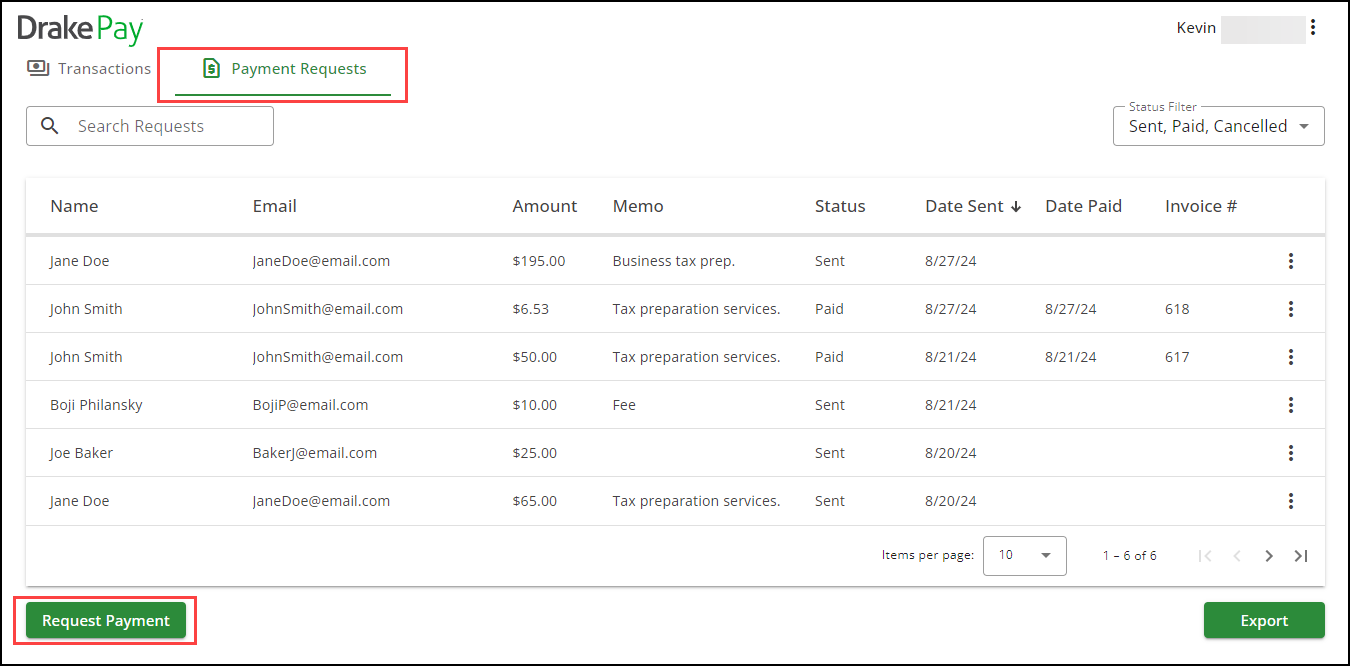
Navigate to the Payment Requests tab. Choose Request Payment.
-
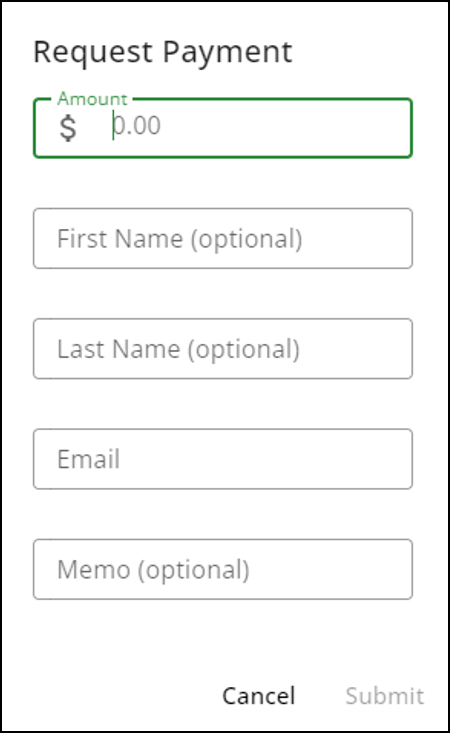
The Request Payment dialog box is opened. Enter the total Amount due and an Email to send the invoice to. (The fields First Name, Last Name, and Memo are optional.)
Note Partial payments are not available at this time. The client must be able to pay the Amount on the invoice in full, otherwise the request must be cancelled. If you need to establish a payment plan with your client, consider sending several smaller invoices.
-
Submit the invoice when finished.
-
The request appears on the Payment Requests tab of the Drake Pay Manager with a status of Sent.
Use the three vertical dots
 beside a pending request to view invoice Details, Resend the invoice, or Cancel a payment request. Invoices that have been paid cannot be canceled or re-sent.
From here, proceed to Drake Pay - Payment Requests - Taxpayer View.
Drake Refund Pay
See Drake Pay - Drake Refund Pay for details.
In-Person Transactions
To make an in-person transaction using the Drake Pay Manager:
-
Log in to the Drake Pay Manager using your Drake Software credentials. See above for information on granting access to the Drake Pay Manager.
-
On the Transactions tab, click New Charge.
-
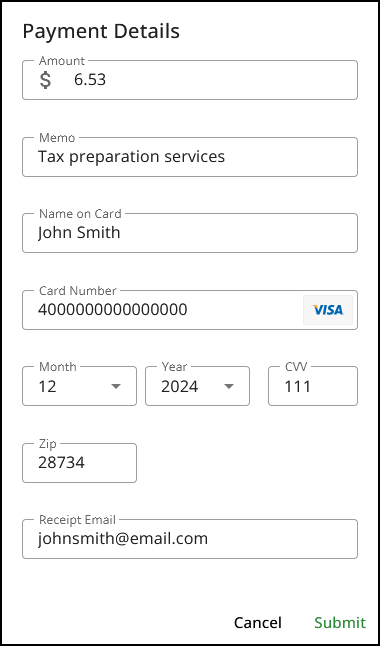
Complete all Payment Details, including the charge Amount, a description of the charge (Memo), the customer’s name, payment information, and email.
-
Submit the payment. If you entered a Receipt Email, your client receives a PDF receipt of the transaction.
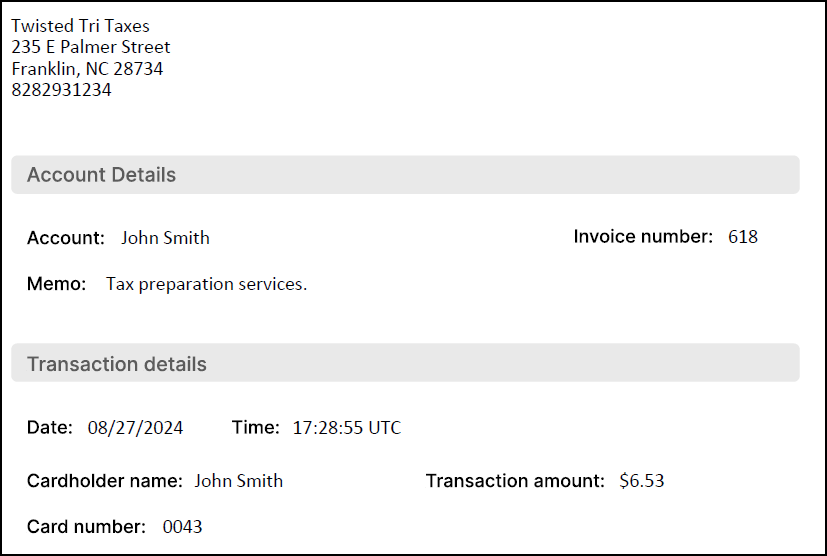
Completed payments appear in both the Drake Pay Manager and the Infinicept® Back Office Portal.
Declined Transactions
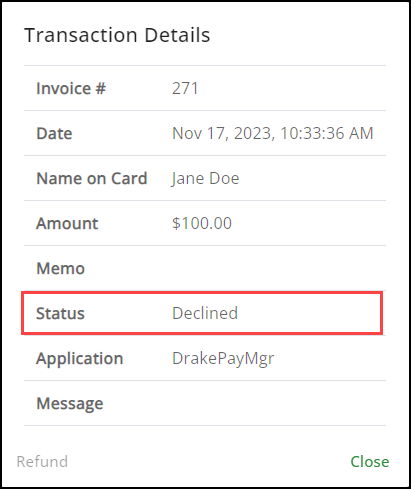
If a transaction is declined, the following message is shown on the transaction window.
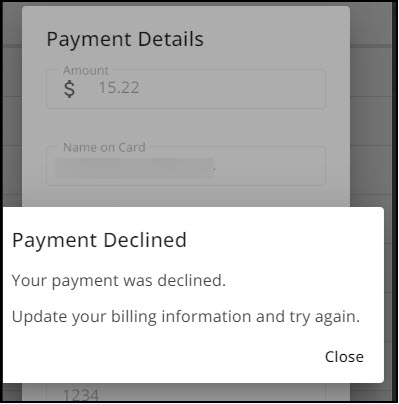
The Transaction Details on the Drake Pay Manager show that it was declined:
