Drake Tax Online - Drake Portals Integration - Setup
Article #: 18793
Last Updated: April 14, 2026

Drake Portals is fully integrated with Drake Tax Online. If you have a current Drake Portals subscription, you can create a unique portal login for each return. This will allow you to exchange documents securely and send the tax return for e-signatures.
Note Pricing is the same as for desktop users.
To set up your Drake Tax Online to use Drake Portals, follow these steps:
-
Log in to your Drake Tax Online dashboard.
-
Click Tools > Drake Portals Setup.
-
Click Link Account. Follow the prompts to log in to your Drake Portals account.
Tip If the account needs to be unlinked at any time, click Unlink Account.
Setup Level
If this is a multi-site account, under Tools > Drake Portals Setup, you can click Setup Level to choose whether all offices must use the master Drake Portals account, or if offices can link their own Drake Portals accounts. Select either Use master Drake Portals account for all offices or Allow offices to link their own Drake Portals accounts, then click Save.
Taxpayer Setup
After you have linked your Drake Tax Online and Drake Portal accounts, you can configure the taxpayer access by following these steps:
-
Launch the return.
-
Click Drake Portals at the top of the screen.
-
Select either Search for a portal account or Create a new portal for this taxpayer and follow the prompts.


Note You can toggle the option to send account information to the taxpayer by clicking the blue link in the gray note section.
Document Upload
After you have completed the Firm and Taxpayer setup (above), follow the steps in Drake Tax Online - Drake Portals Integration - Document Upload to upload the return to the taxpayer's portal.
Drake e-Sign Online
See Drake Tax Online - Drake Portals Integration - Drake E-Sign Online for more detailed steps on sending signature documents.
Manage Client Account
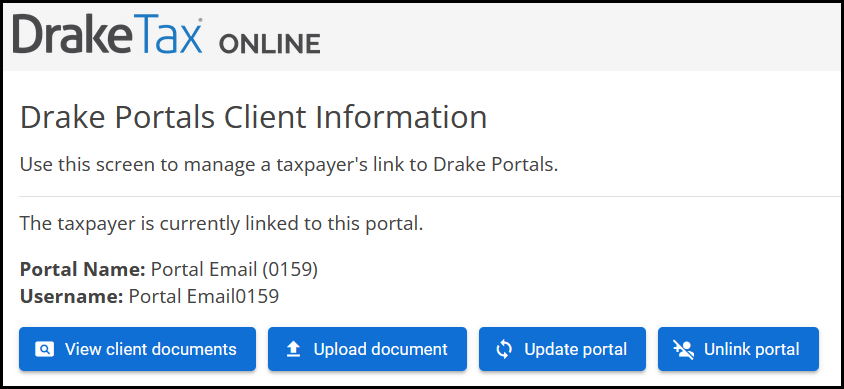
Once you have linked a taxpayer file to a client portal, you can manage the portal by opening the return and selecting the Drake Portals button. Use the following options as needed:
-
View client documents - opens the Files tab of the Drake Portal page for this client.
-
Upload document - allows you to upload the return as a PDF document to the taxpayer portal. You can choose to Upload for client, Upload for E-Sign, or Upload for Office Use Only.
-
If you choose this option instead of following the document upload process above, it will upload a copy of the latest PDF that was created using the View Return functionality.
-
If you want to upload a different document, you will need to log into your Drake Portals online account and select the taxpayer’s portal.
-
-
Update portal - synchronizes information to ensure that the portal details are up to date.
-
Unlink portal - disconnects the Drake Tax Online client file from the existing Drake Portal account.
Important This does not delete the taxpayer's existing Drake Portal account.