Drake Accounting - Using NACHA in DAS
Article #: 20058
Last Updated: July 22, 2025

Drake Accounting now allows users to use NACHA for direct deposit. Information for direct deposit will be pulled from Employees > Employee Setupor Payables > Vendor Setup.
Setting up NACHA
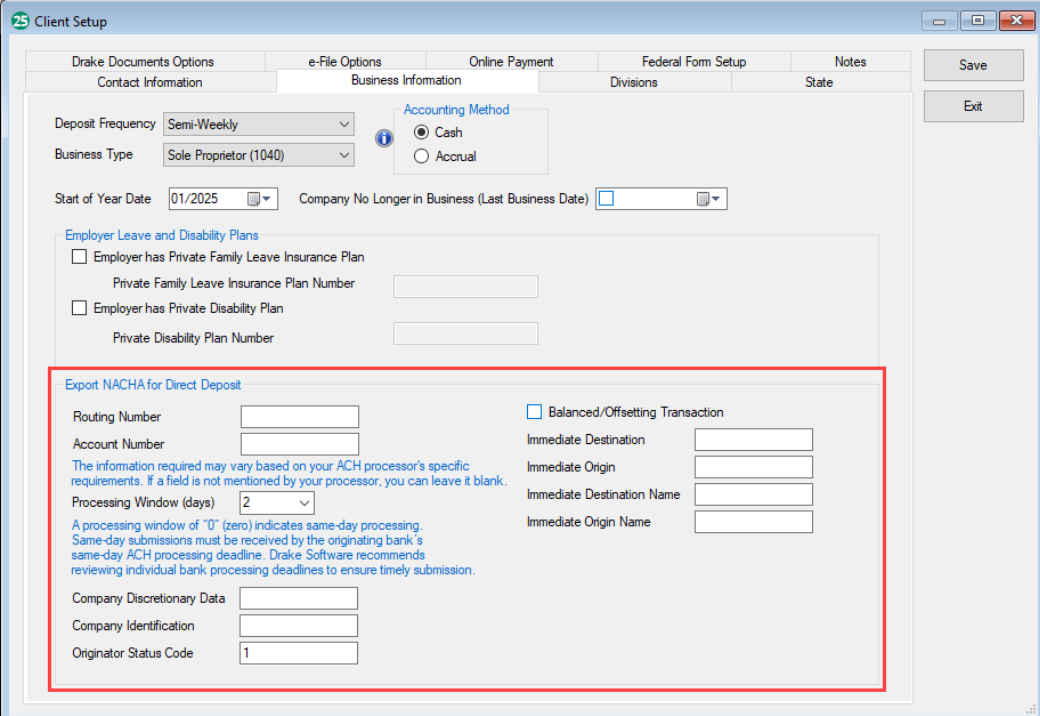
To enter NACHA-specific information, navigate to Client > Edit > Business Information. Be sure to consult your bank or ACH processor for their specific NACHA formatting requirements. You can input that information here. If a field is not required by your processor, you may leave it blank.

Below are descriptions of each field and their purpose:
-
Routing Number- The routing number of the bank account from which the money is being sent.
-
Account Number- The account number of the bank account from which the money is being sent.
-
Processing Window- The number of days after file creation when the file should be settled. If the settlement day falls on a weekend or federal holiday, the file will be processed on the next business day.
-
Company Discretionary Data- Some processors require specific data in this field.
-
Company Identification- Typically assigned by your processor, this ID is used to identify the company submitting the file. Some processors may require specific information here.
-
Originator Status Code- A code associated with the processor. This field is set by default to "1."
-
Balanced/Offsetting Transaction- When checked, an additional entry record will be added to the batch. This entry will debit the checking account to offset the total credits in the batch.
-
Immediate Destination- The nine-digit routing number of the institution receiving the ACH file for processing, typically your bank's routing number.
-
Immediate Origin- The nine-digit routing number of the institution sending (originating) the ACH file. (Often, your processor will ask you to enter your company ID in this field.)
-
Immediate Destination Name- The name of the financial institution receiving the payment file.
-
Immediate Origin Name- The name of the financial institution sending the payment file.
To use direct deposit through NACHA:
-
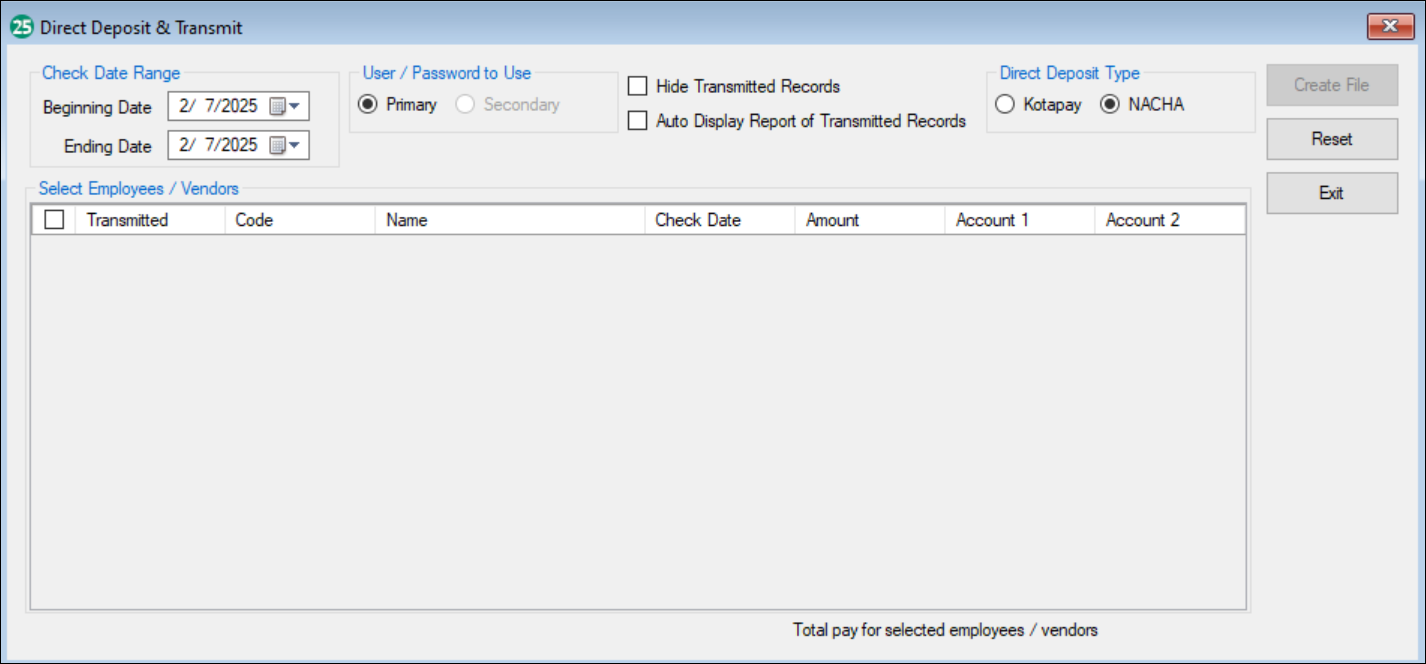
Go to Employees or Payables > Transmit Direct Deposit.

-
Check Date Range: Select the Beginning Date and Ending Date range for the checks you want to transmit.
-
User/Password to use: This is only used for Kotapay, ignore if going through NACHA.
-
Hide Transmitted Records: Click this box if you want to hide records that have already been transmitted.
-
Auto Display Report of Transmitted: Click this if you want a report of transmitted records to display automatically.
-
Direct Deposit Type: Click circle next to NACHA to transmit using NACHA.
-
In the grid, select the records you want to transmit by clicking the box beside each record, or click the box at the top next to Transmitted to select all.

-
Click Create File.
-
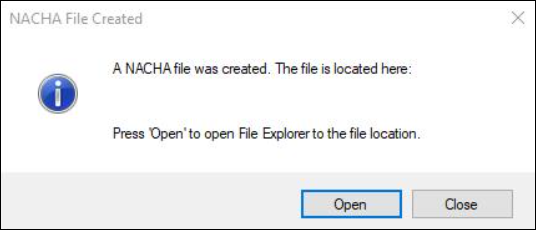
Once created, a popup will display indicating the NACHA file was created successfully. The NACHA file can be uploaded to your bank's processing website or other NACHA file processors.

-
Click Open to view the file or Close to close the window.