Drake Portals - Guest Exchange - Client Upload
Article #: 13763
Last Updated: December 05, 2024

Anyone to whom you provide your SFP website address can upload files to you through Guest Exchange. You are not required to establish a client account, and the sender does not need a username and password. A name and email address suffice.
Note You must enable the Guest Exchange feature on your Drake Portals account before it is visible to clients/taxpayers.
The client will:
-
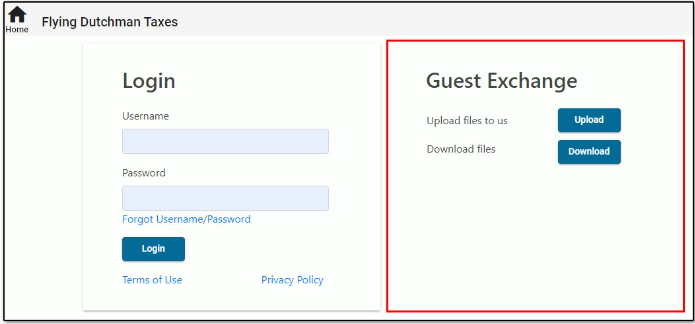
Navigate to your Drake Portals website and locate the Guest Exchange panel:

-
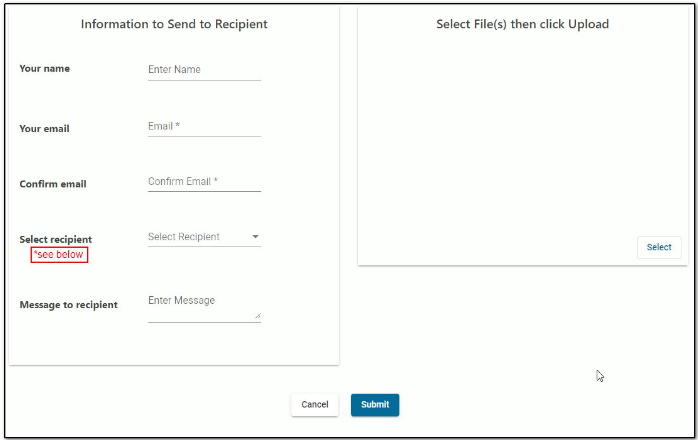
Click Upload. The upload screen is displayed:

-
Complete all informational fields as needed.
-
Click Select to browse for the file(s) to be uploaded.
-
Click Submit.
Notes:
-
*The Select recipient field is only displayed available if you have chosen to Allow client to select Preparer on file upload. This setting can be found under by clicking on your username > Account Settings > Advanced Settings in the Notifications section.
-
An email notification is always sent to the selected preparer or to the default email address identified in your setup. The account settings email option Send e-mail when clients upload/download files does not affect Guest Exchange.
-
If the total file size exceeds your portal storage limit, the client receives an error message.
After a file has been uploaded, you will receive notification and be able to access it from the Guest Exchange portion of Drake Portals under Incoming Files.
Watch the video Guest Exchange for a demonstration of the Guest Exchange functions.