Drake Portals - Multi-Site Ordering
Article #: 18675
Last Updated: November 13, 2025

Parents of multi-site offices with an annual Drake Portals account can now purchase new Drake Portals accounts for their sub-offices that do not have an existing account. This process has been streamlined and allows the parent to review details for each of their sub-offices in one place.*
*Parents who do not currently have an annual Drake Portals account must either purchase an annual plan or convert their monthly plan to an annual plan before adding sub-office accounts.
Note Additional reporting options will be available in a future release.
Ordering Process
-
If you received an email with a link to order, select Yes to indicate that you are a current Drake Software customer.
-
If you prefer, you can skip steps 1-3 and just log in to your Drake Portals account directly and start with step 4 below.
-
-
Log in using your SSO credentials.
-
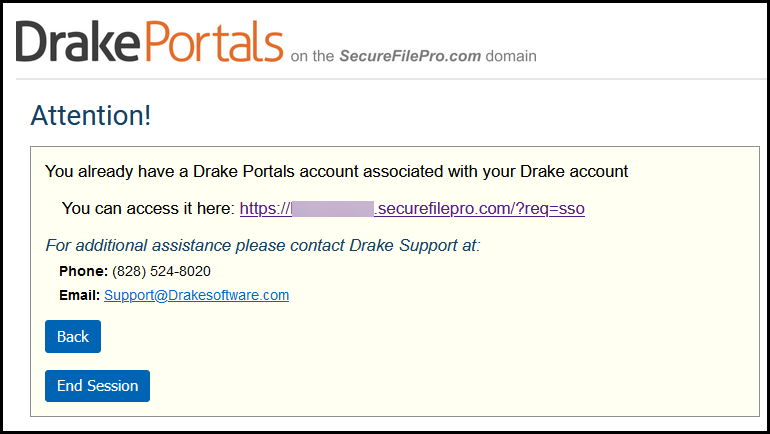
A message displays that your Drake Portals account has been located. Click the portal URL to be logged into your Drake Portals parent account.
-
If you do not currently have a portal account, you will be prompted to purchase prior to continuing. You must select an annual plan to continue with adding sub-account portals.
-
-
At the top right, select the hamburger menu and click Account Settings.
-
Near the bottom of the page, expand the Advanced Settings section.
-
Under Account Owner, choose Change/Update Subscription.
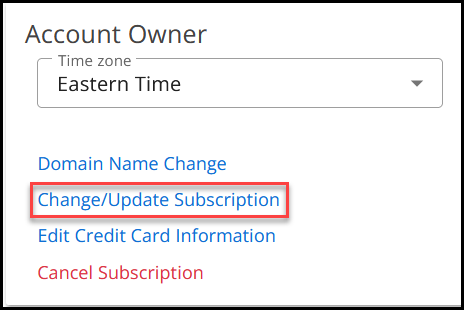
Caution This process will charge the card that is on file for the Parent account. If you need to use a different card, go to Account Settings > Advanced Settings > Edit Credit Card Information before continuing.
-
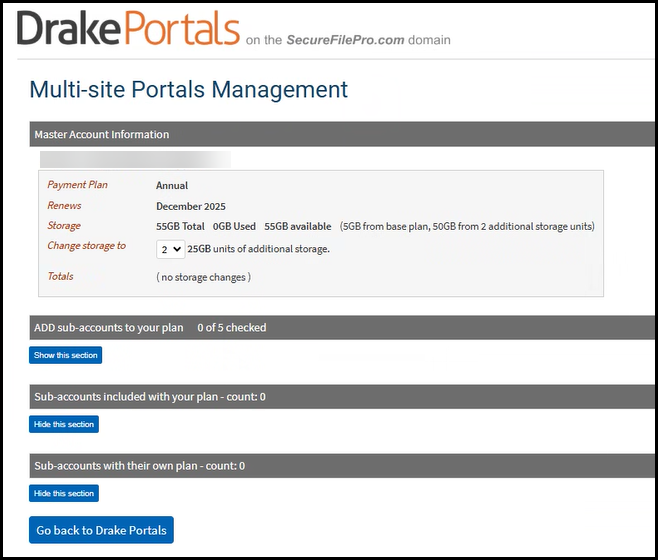
The Multi-site Portals Management page loads.
-
You can make changes to your parent account, if needed.
-
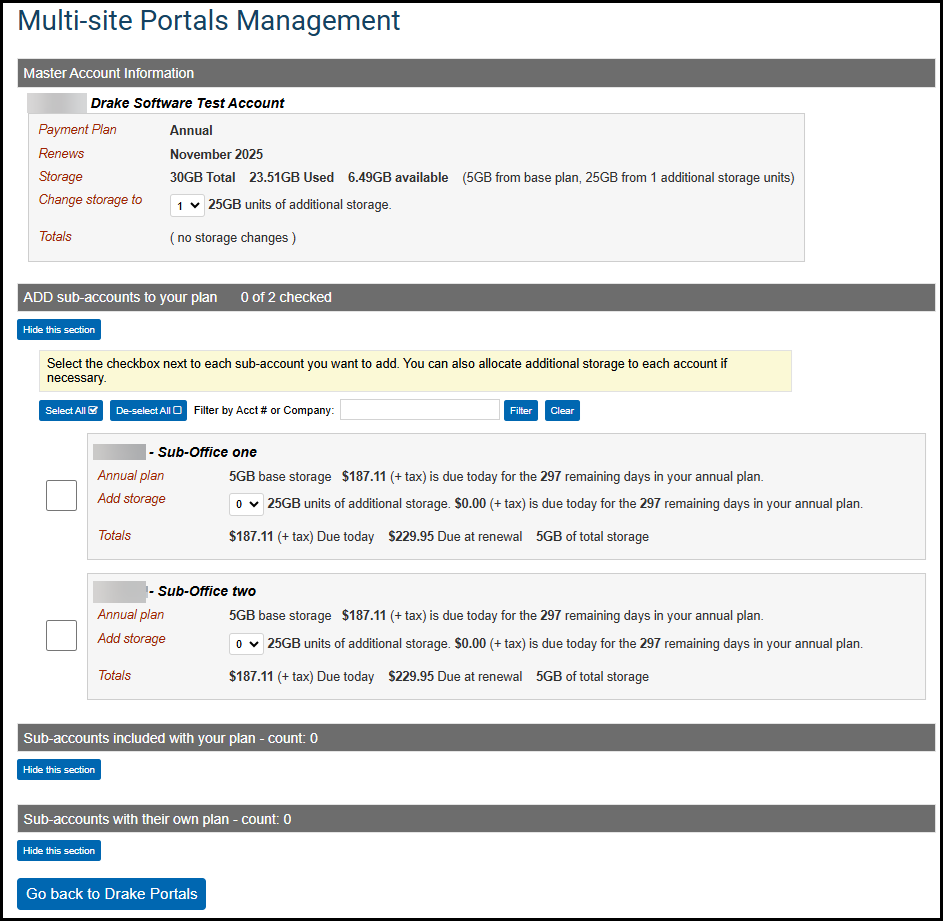
Under ADD sub-accounts to your plan, click Show this section.
-
Select the check box next to each sub-account that you want to add (or click Select All). You can also allocate additional storage to each account, if necessary.
-
Under Sub-accounts included with your plan, verify the sub-accounts that are currently included on your plan.
-
Under Sub-accounts with their own plan, you can see if any sub-accounts already have their own subscriptions.
Important If a sub-account already has their own portal, you cannot move that portal account into the multi-site plan.
- When you have made all your selections, click View summary and checkout.
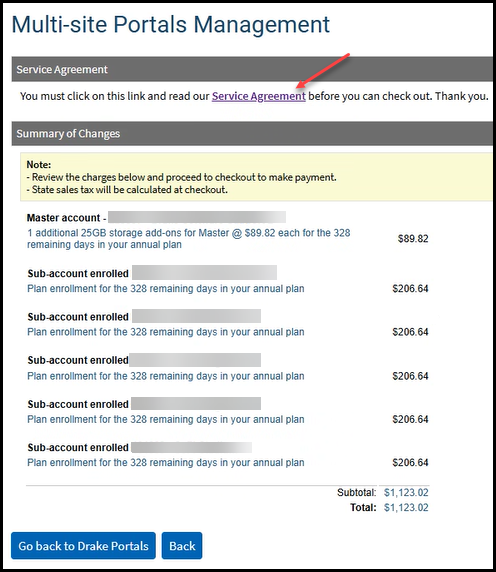
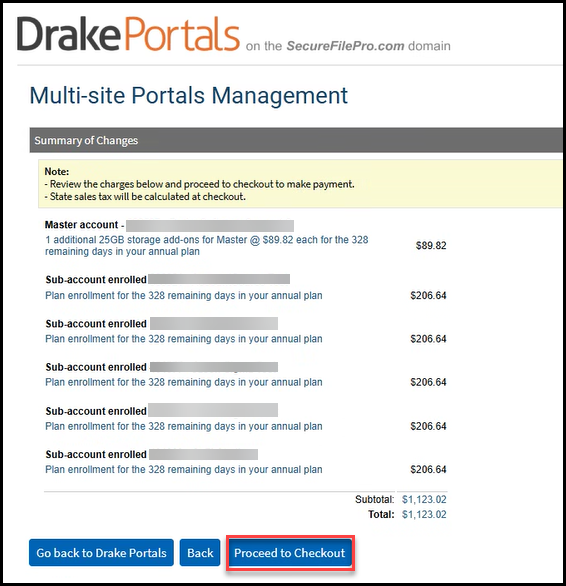
- The summary of changes displays. If you are ready to proceed, click the Service Agreement at the top of the screen. This will open the document in a new window for you to review. You will not see the option Proceed to Checkout until you have opened the Service Agreement.
- Click Proceed to Checkout.
- On the Order Summary page, click Calculate Taxes before checkout.
- Click Place your order.
- A confirmation is displayed. You will also receive an email receipt of your subscription changes.
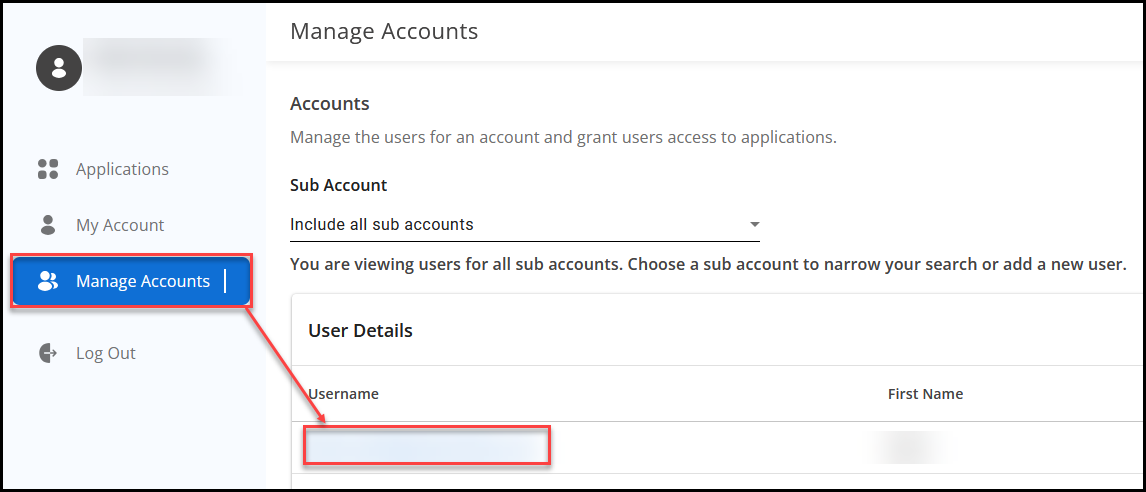
- Log in to the Drake User Manager.
- Go to Manage Accounts and edit your user.
- On the Application Access tab, locate Drake Portals in the list and click the Edit icon. Verify or select applicable roles for your account.
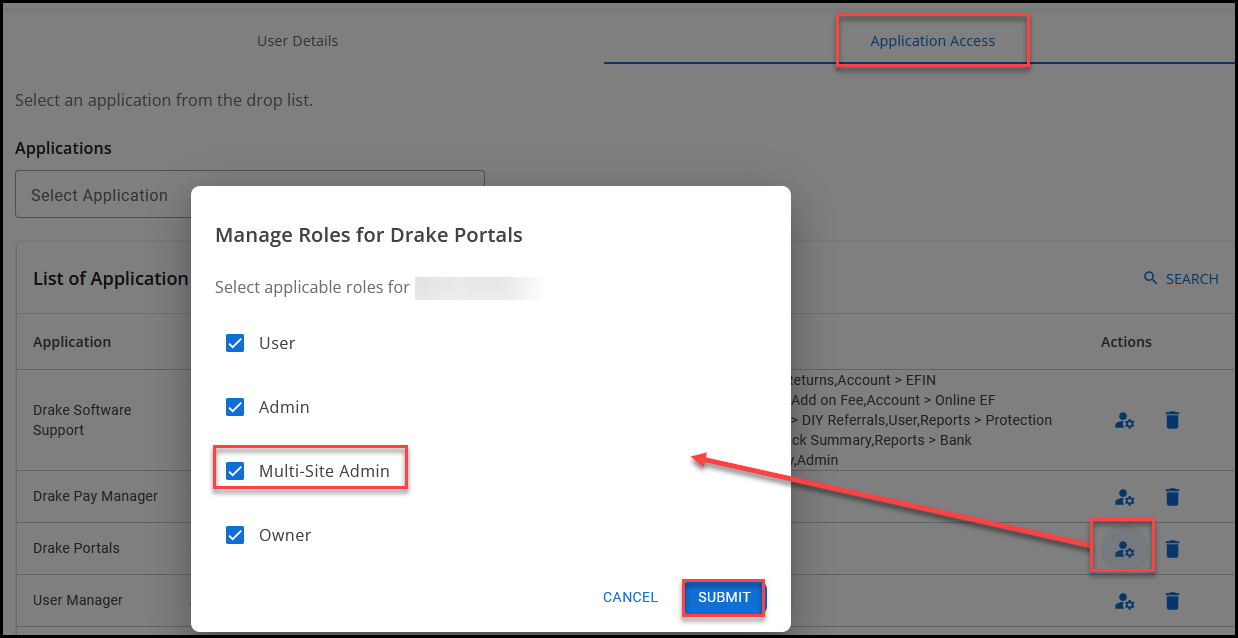
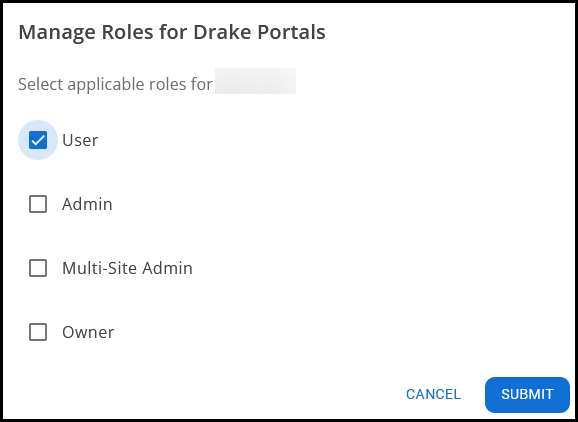
Generally, the Admin or owner will want full permission (all options).- User - This role allows basic access to Portals
- Admin - This role can manage other Portals users.
- Multi-Site Admin - This role allows multi-site administrators to view and manage Portals for their sub accounts.
- Owner - This role can edit payment information and other global Portals settings.
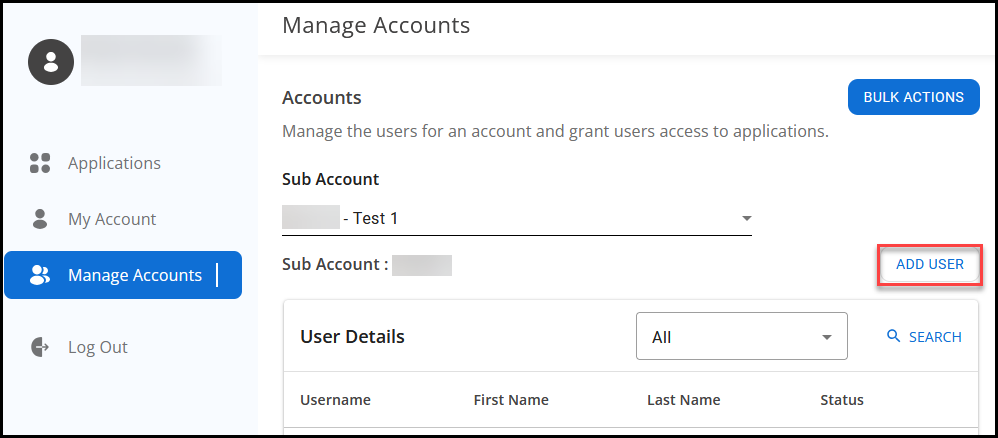
- On the Manage Accounts tab, click Add User and configure access to the new sub-account portals, as needed.
- Click Add User.
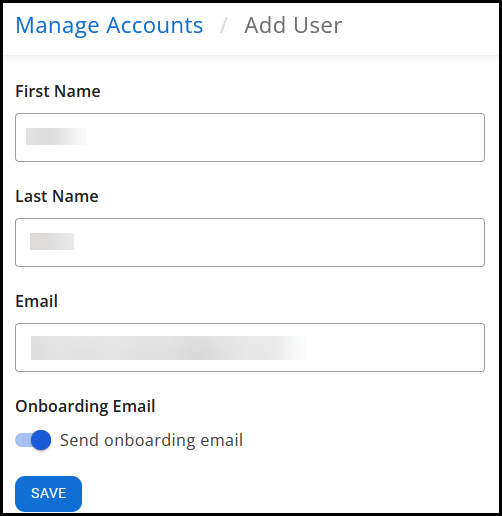
- Enter the new user's details and click Save.
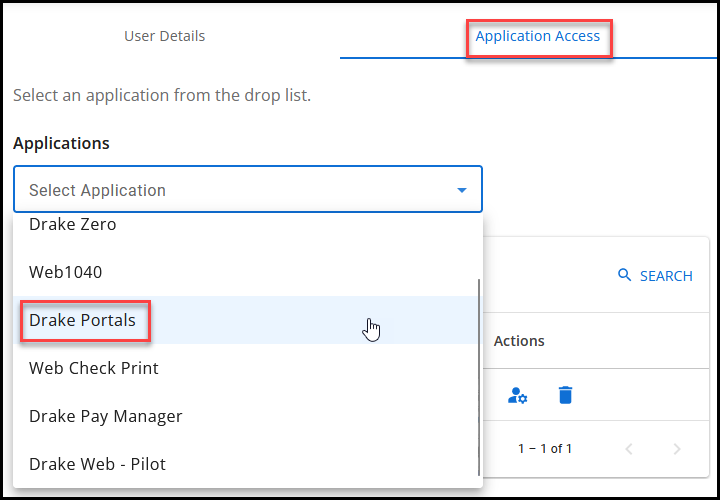
- Go back to Manage Accounts, select the newly created user from the list, and click on the Application Access tab.
- From the Applications drop list, select Drake Portals.
- Select the roles that the user needs and click Submit.
- If a sub-office user already has a support site log in, you can edit their account to add the application access and permissions for Drake Portals.
- Other users must have at least a role of User or they will not be able to log in to Drake Portals.
- Click Add User.