Drake Portals - Request Files Feature
Article #: 18158
Last Updated: November 03, 2025

You can now select the option Request Files on the Drake Portals website. This sends an email to the client with a secure link that can be used to upload files directly to the Documents to Preparer folder without having to login to their portal. The link can only be clicked one time, however, they can choose as many files as needed during that upload session. Once the browser window is closed, they will have to either login to the portal to upload more files, or you can send another request link. Detailed steps are below.
Tip This article is also available in Spanish (para Español, ver Drake Portals - Opción para Solicitar Archivos).
-
Log in to your Drake Portals website and locate the client in the list.
-
On the right, choose the hamburger icon and click Request Files.

Note This option is also available by choosing the hamburger menu after loading the client's portal page.
-
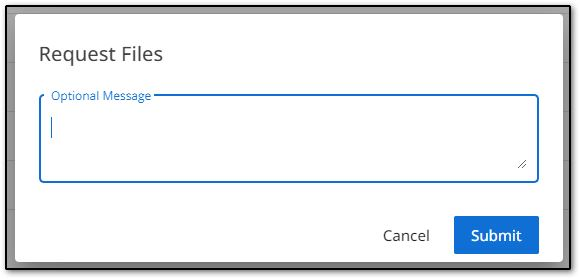
On the Request Files pop-up, enter a message (optional) and click Submit.

-
A notice will display along the bottom that says File request sent to client.

-
Once the client/taxpayer has uploaded a file, you will get an email notification. To retrieve the files, log into Drake Portals and navigate to the client's Documents to Preparer folder.
Note This feature is only available from the Drake Portals website, and is not available in the SFP Pane of Drake Documents.
Client/Taxpayer
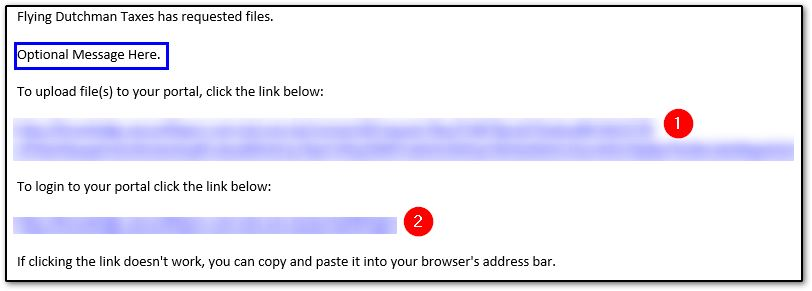
You (taxpayer/client) will receive an email that says "[Firm Name] has requested files." with two links. If the preparer entered an optional message (in step 3 above), it will also appear in the email. The first link is the direct upload and the second is a link to your regular portal login. The first link can only be clicked one time.

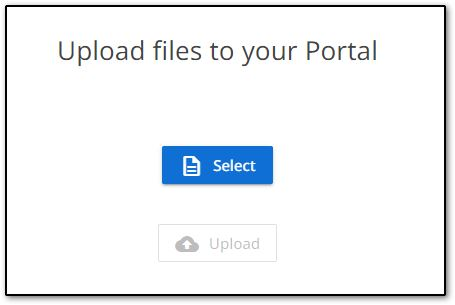
When you click the first link, you will see the following window. If the preparer included a message, it will also be shown above the Select icon.

To upload files,
-
Click Select.
-
A file browser window opens, locate the first file to upload and click Open.
-
Repeat steps 1 and 2 as needed to choose additional files.
-
When all files have been chosen, click Upload.
.png)
-
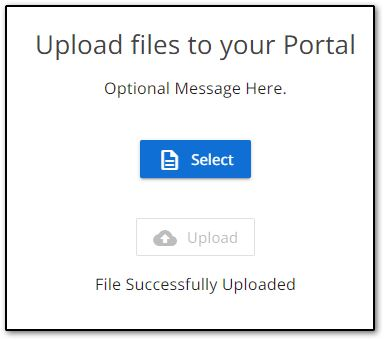
The window displays a success message. Additional files can be selected for upload from this window, if needed.

Important Once the browser window is closed, the client will have to login to their portal to upload additional files. The email link will only launch the Upload files to your Portal window once. Subsequent clicks will redirect to the regular log in window.