Drake Portals - Upload and Download Client Files
Article #: 17697
Last Updated: December 05, 2024

-
Open Drake Documents.
-
Locate the Drake Portals pane at the bottom right of the Drake Documents window.
Tip If you do not see this, select to restore or maximize.
-
Enter your Drake Portals Username and Password and click Login.
-
Locate and select the taxpayer and folder that contains the file that you want to upload. The file will be displayed in the upper right window.
-
On the Files tab in the Drake Portals pane, select which Folder into which you want to upload the file.
-
For example, choose Documents from Preparer. The window changes to show this folder and its contents on Drake Portals.
-
-
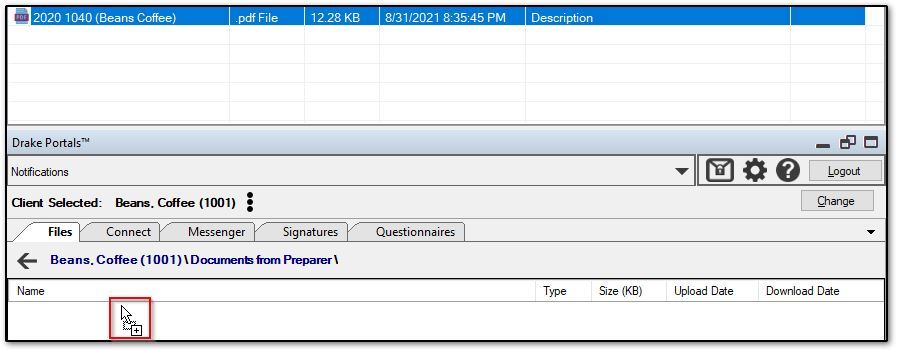
In the upper right pane, left click to select the document that you want to upload and drag it down into the lower Drake Portals pane. The cursor will show a + sign indicating that the document(s) will be uploaded or added to this folder. When the cursor changes, release your mouse click to upload the file.*

-
The taxpayer receives an email notification that new documents are available for review. Once they download the PDF, a Download Date will also display in this pane.
Note *You can also copy the file from the documents pane and paste in the Drake Portals pane after selecting the destination folder.
File Download
-
To download a file, open Drake Documents and locate the client in the left tree menu.
-
In the Drake Portals pane, click on the Files tab and open the folder Documents to Preparer.
-
Locate the file and either right click and copy the file or use the drag-and-drop function to move it to the client's Drake Documents folder.