Drake Portals - Questionnaires - Fillable Web Forms
Article #: 17699
Last Updated: December 05, 2024

You can send a range of web forms to collect additional information from a client.
-
Click on the Connect tab.
-
Click Select to the right of Questionnaires (1040).

-
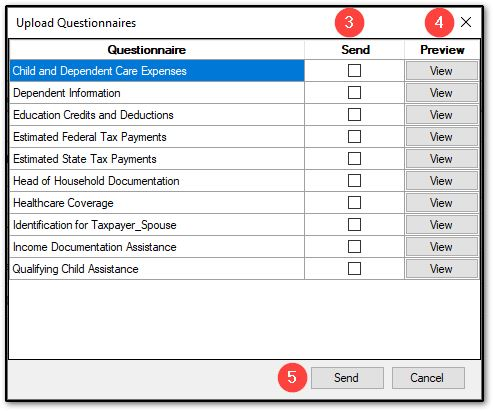
Check the box beside each desired web form in the Send column.
-
If you’d like to preview the form, click View under the Preview column.
-
Click Send.

-
The client will receive a notification email and find the web forms in the Questionnaires section.
-
They can edit directly by clicking the pen icon or choose additional options in the blue option listing.
-
The additional option, Create Blank Copy can be used when multiple forms are needed for the same taxpayer. For example, if there are two children, they will select the option beside the Dependent Information form and choose Create Blank Copy. Then Rename the form for each additional child. When completing the form, make sure that the "Index Number" is unique for each form (functions like a Multi-Form Code entry - the first one should be 1, second one should be 2).
-
-
The taxpayer must click Submit for the changes to be uploaded.
.png)
-
Once the taxpayer clicks Submit, the file is sent back to the preparer. The preparer can use the Questionnaire tab to view the submitted questionnaires. From the same tab, the results of the questionnaires can be imported into the tax software.