Drake Accounting - Adjusting Perforations on Preprinted Checks
Article #: 15624
Last Updated: December 05, 2024

Due to multiple options of operating systems, printers, and check formats, minor adjustments may be required to make checks print properly. Use the Check Designer feature to change the alignment of information printed on pre-printed payroll and vendor checks. Drag and drop fields on the Check Design tab to match your pre-printed checks.
Note It is recommended that you make a copy of a check and print a test check to make sure the information matches and is positioned properly. This prevents wasting check stock.
-
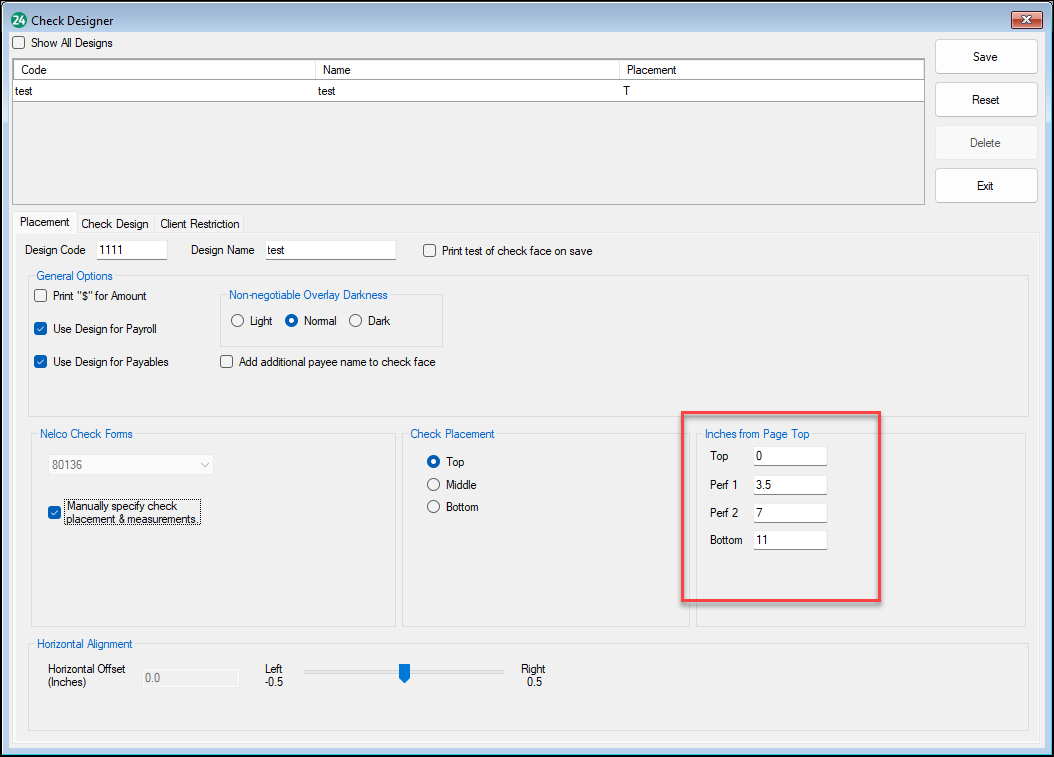
To edit perforations, on the Placement tab, check the Manually specify check placement and measurements box, then select the applicable Check Placement option. In the Inches from Page Top section (to the right), adjust the measurements for the Top, Perf 1, Perf 2, and Bottom.
-
The Top can be adjusted up or down from the very top of the check stock.
-
Perf 1 and Perf 2:
-
Perf 1 will adjust the top of the middle check
-
Perf 2 will adjust the bottom of the middle check
-
-
The Bottomcan be adjusted up or down from the very bottom of the check stock.
-
Repeat this process for the other check formats as needed.
-
Click Save when finished.

You can drag and drop fields on the Check Design tab to match your pre-printed checks.